


You lift the basket from the tank, rinse the parts, and find the same film or dark residue still sitting in the corners of your jewelry, instruments, or machined components. The cleaner is running, the solution looks usable, and yet the finish isn't consistent. In many workshops, the first suspect is the ultrasonic machine. The overlooked culprit is often the basket.
An ultrasonic cleaning basket controls where parts sit, how freely solution moves around them, and whether the tank floor or transducers take unnecessary contact. It can also return contamination to parts that were already clean. The right basket isn't just a container. It's part of the acoustic, chemical, and handling system that determines whether the cycle works.
Why Your Ultrasonic Cleaning Basket Matters
A batch can leave the ultrasonic tank looking clean while oil remains in recesses, threads, or corners. The machine may be running correctly, yet the basket can still produce uneven results by holding parts in the wrong position, restricting solution movement, or carrying residue from one load into the next.
A basket has three practical jobs: keep parts suspended in the active cleaning zone, prevent direct contact with the tank or transducers, and let operators move the load without touching freshly cleaned surfaces. Its design affects all three. A basket that fits the tank can still perform poorly if its mesh, depth, or load capacity does not suit the parts.
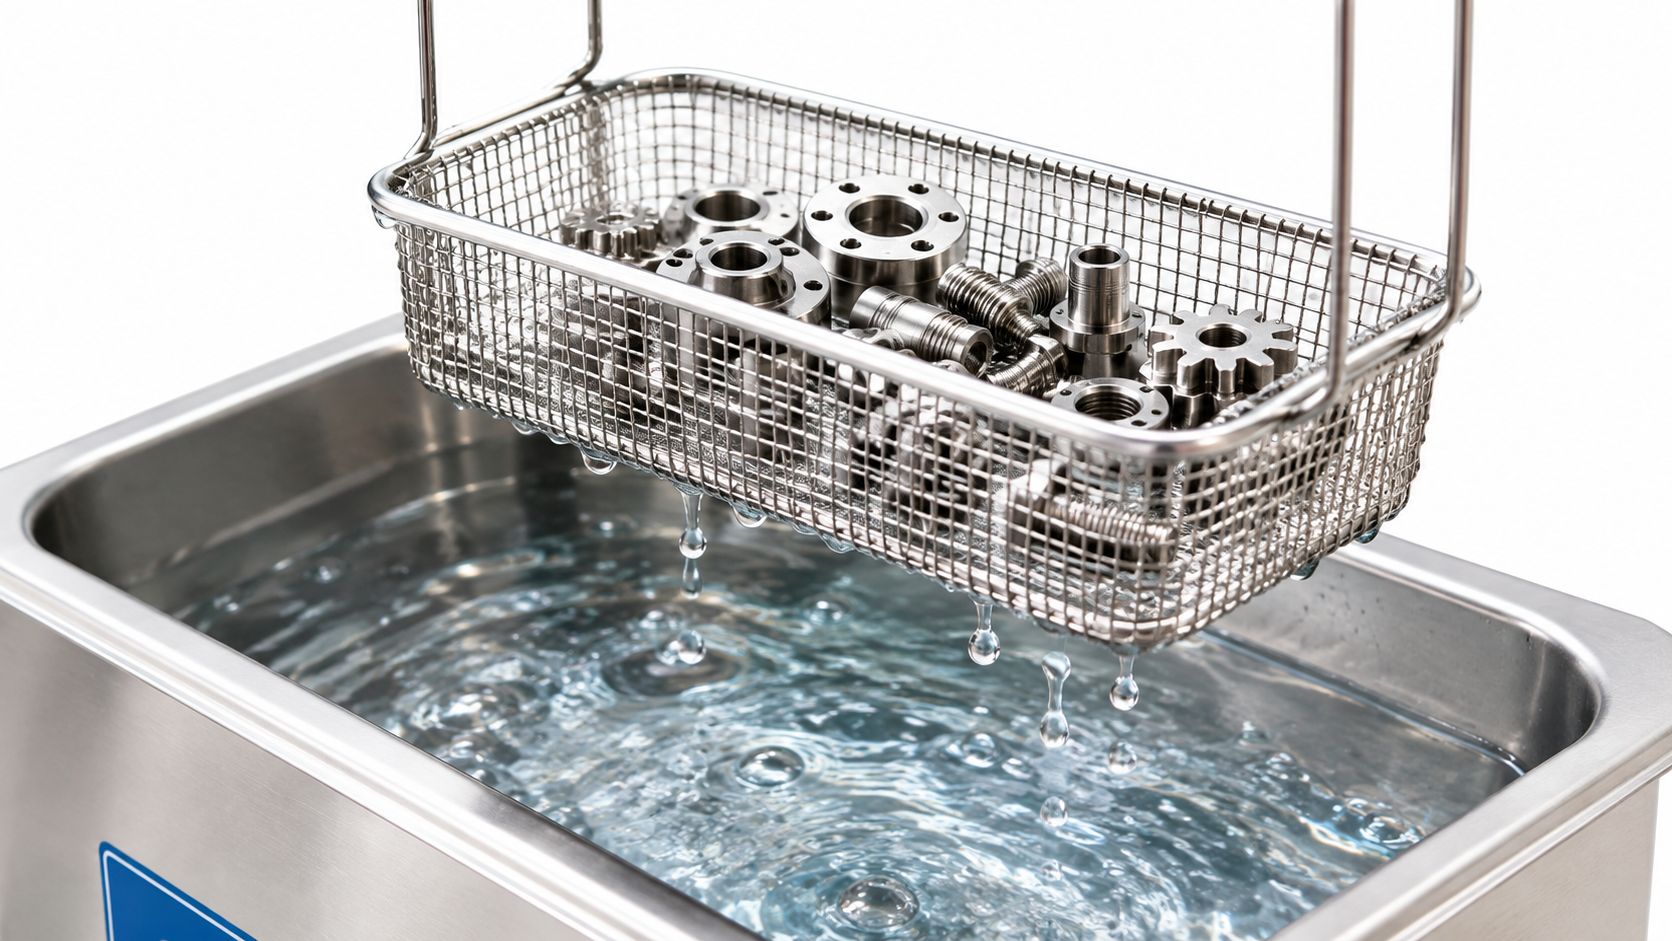
The basket is part of the cleaning path
Ultrasonic cleaning relies on cavitation, so solution and acoustic energy must reach the surfaces being cleaned. An open wire basket supports that movement while retaining the load. Technical specifications list mesh options from 1x1 to 8x8, with open-area values ranging from 77.4% down to 38.9%. The difference shows how mesh density affects drainage and solution flow (Art Craft Welding's basket specifications).
Fine mesh suits small screws, jewelry findings, and laboratory pieces that might fall through a coarse opening. It also holds sludge more readily. A coarse, open weave improves drainage around larger components, but it may provide inadequate support for small parts. The right choice depends on both the part size and the contamination being removed.
Tank fit is only the starting point
A basket can fit inside the bath and still create dead spots. Parts may sit too low, press against one another, or settle into a tangled pile that shields their hidden faces. Load geometry matters as much as the basket's outside dimensions. Arrange components so solution can pass around them, and avoid filling the basket until the load becomes a solid mass.
Jewelry work may require fine containment, while heavy metal components usually benefit from stronger support and more open drainage. Consider part geometry, soil type, solution chemistry, and how the load will be lifted and rinsed. General equipment guidance is available through the Star Cleaner knowledge hub, but the basket still needs to be checked against the actual tank and workload.
Workshop rule: If parts clean only after you rearrange them during the cycle, the load geometry is wrong.
The basket also forms a feedback loop between its condition and cleaning quality. A crowded or poorly arranged load leaves residue behind. That residue settles into the mesh, reducing flow on the next run. A dirty basket can then release particles onto a cleaner load, so operators see declining results and increase cycle time or temperature instead of correcting the source. Inspect the mesh, corners, and support points whenever cleaning quality changes.
Choosing the Right Basket Material
Material choice affects ultrasonic transmission, chemical durability, part protection, and maintenance. It also affects cleaning consistency over time. A basket that resists the bath but holds residue in damaged areas can turn a sound cleaning process into a source of recontamination.
Stainless steel for general and precision work
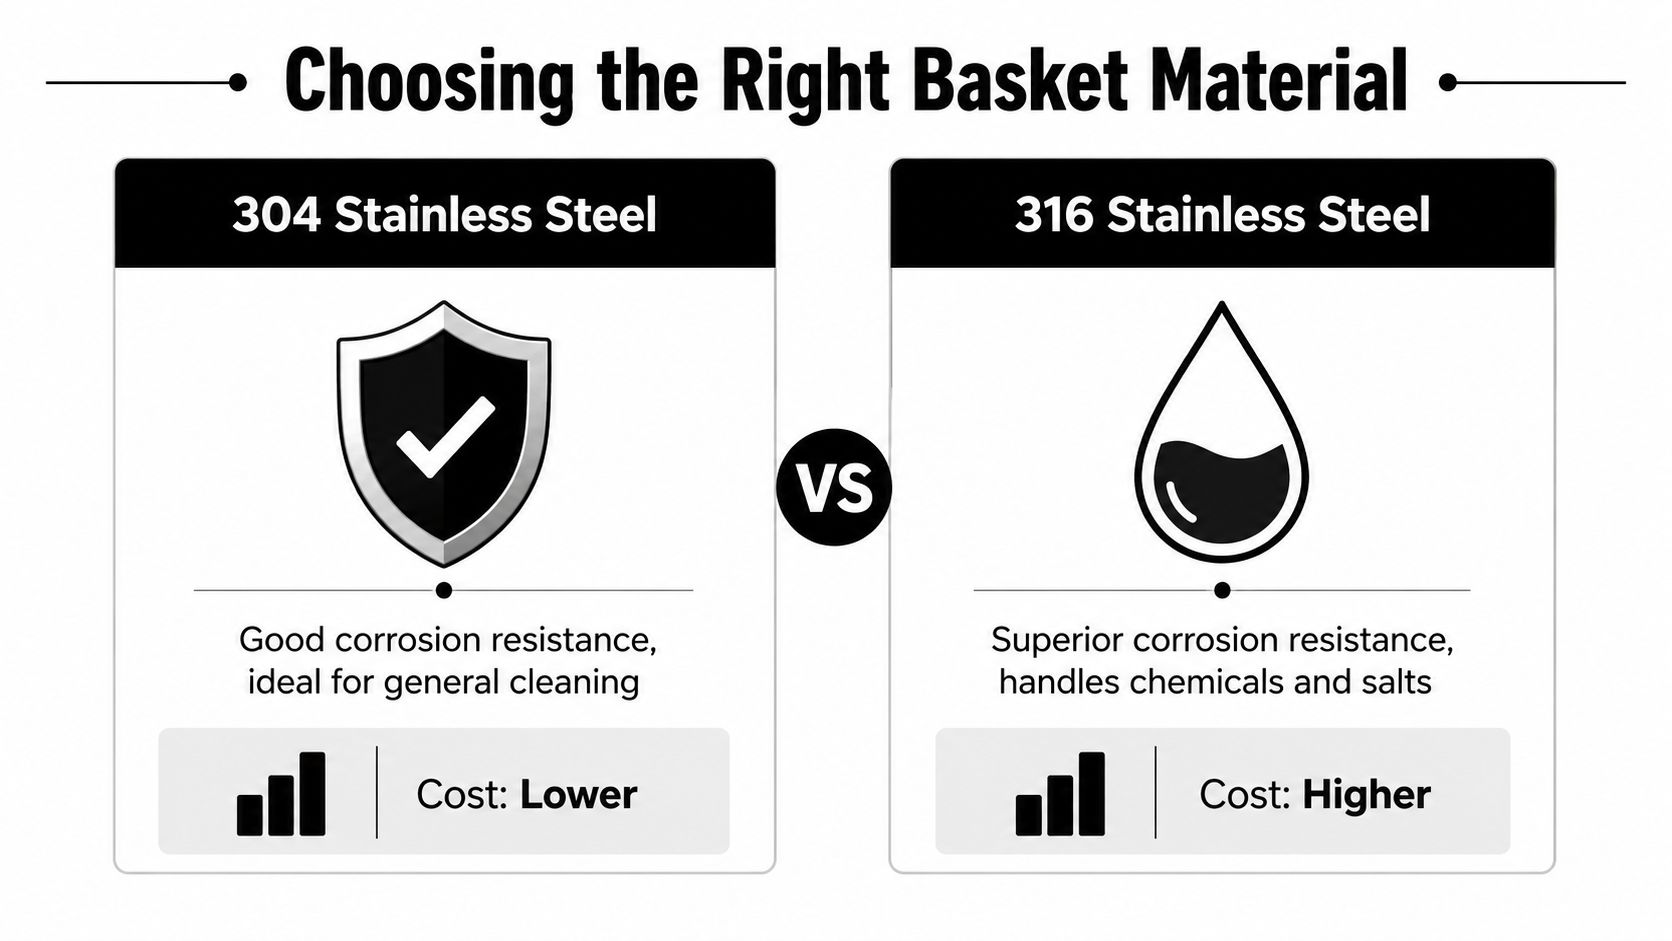
304 and 316 stainless steel are the main choices for ultrasonic baskets because they tolerate aqueous, acidic, and alkaline solutions when the grade matches the chemistry. The correct choice depends less on the basket's appearance than on the cleaner, exposure frequency, temperature, and residues left on the parts. Construction details for stainless baskets should be checked against Art Craft Welding explains stainless basket construction and the manufacturer's specifications for 304 or 316 stainless.
304 stainless steel suits routine workshop and maintenance work. It handles many water-based cleaning solutions and is often the practical choice for common metal parts, tools, jewelry components, and general loads. Its lower cost makes sense when the bath is controlled and chloride or aggressive acidic exposure is limited.
316 stainless steel is better suited to more demanding chemistry. Its molybdenum content improves resistance to pitting in chloride-containing or acidic baths, which is why laboratories using citric or phosphoric cleaners may specify it despite the higher cost. The upgrade pays for itself when it prevents pitting, surface contamination, or premature basket replacement.
The basket's condition becomes part of the cleaning process. Corrosion products, embedded soil, and roughened wire can trap residue between cycles. That residue can then transfer to a cleaner load, while a damaged surface may mark parts during lifting or rinsing. Inspect the welds, corners, handles, and areas that sit in the solution whenever cleaning results decline. Extending cycle time will not correct contamination coming from the basket itself.
Where plastic earns its place
Plastic baskets suit fragile glass, coated parts, and some gemstones where metal contact could cause scratches or marks. The softer surface helps during loading and unloading, especially for polished components that cannot tolerate repeated impact against wire.
The trade-off is reduced acoustic performance. Plastic can dampen ultrasonic waves, limit cavitation, and retain particles against or within the basket, according to Marlin Wire's analysis of plastic ultrasonic baskets. The effect depends on polymer type, thickness, perforation, loading, and bath conditions. A plastic basket that protects a surface may still leave contamination behind, and that residue can return to the next load.
| Requirement | Stainless steel | Plastic |
|---|---|---|
| Chemical exposure | Select 304 or 316 to suit the solution | Verify polymer compatibility |
| Fragile surfaces | Can mark parts during contact | Softer contact reduces marking risk |
| Cleaning consistency | Maintains performance when corrosion and residue are controlled | May reduce cavitation and retain contamination |
| Best use | General, industrial, laboratory, dental, jewelry, and precision work | Fragile items where surface protection takes priority |
Start with stainless steel when strong cavitation and repeatable cleaning matter most. Choose plastic when preventing contact damage justifies the possible reduction in acoustic performance. In either case, basket inspection belongs in the cleaning routine, because material condition directly affects the quality of the next load.
Selecting the Perfect Basket Size and Fit
A basket can fit the tank and still produce poor results. If it sits too low, crowds the walls, or encourages a deep pile of parts, ultrasonic energy and cleaning solution cannot reach the load evenly. Residue then remains on the basket or components and can recontaminate the next cycle.
Measure the working space, not just the outside
Measure the tank's internal width, depth, and usable height. External cabinet dimensions do not show the space available for cleaning. Measure the largest part as well, including handles, clips, protrusions, and fixtures that must stay attached.
Use the measurements as a practical fit check. Working height determines whether every part stays immersed at the operating fill level. Side clearance prevents contact with the tank walls, corners, handles, and internal fittings. Floor clearance keeps the basket away from the tank and transducers. Leave room for solution circulation and for lifting the basket without scraping the tank. Finally, check the combined mass of the parts and solution retained in the mesh. The basket should support that load without bowing or distorting.
Manufacturer guidance recommends holding the load about an inch above the tank bottom, with basket dimensions intentionally smaller than tank dimensions (RS's ultrasonic cleaner basket guidance). This spacing reduces vibration transfer to the tank and keeps the parts in a more effective cavitation zone.
Fit the basket to the parts
A benchtop example uses a 7.8 x 4.2 x 2.0 inch basket inside a 9.4 x 5.4 x 3.9 inch tank. The basket occupies the working area without filling it, leaving room for solution movement and safe lifting.
Do not choose the largest basket that will physically fit. A deep basket encourages stacked parts, creating contact points and acoustic shadows. A shallower basket can spread components into a more open, controllable layer. That geometry affects the cleaning result, not just handling convenience.
For tiny pieces, use a fine screen or beaker-style insert so parts cannot escape through the mesh. For larger pieces, an open weave usually improves drainage and exposes more surface to the bath. Match the basket depth to the load's shape, especially when parts must remain separated rather than piled.
A basket that fits the tank but forces the parts onto the floor is the wrong basket.
Inspect the basket after each demanding run. Bent mesh, clogged openings, or trapped soil reduces flow, changes how the load sits, and can return contamination to a later batch. Basket condition therefore becomes part of the cleaning feedback loop: uneven results may indicate a poor fit or a fouled basket, not only an incorrect cycle.
Check the manufacturer's rated load before buying. Industrial and benchtop basket specifications describe capacities ranging from about 3 kg to 10 kg, depending on the system and basket design, per RS guidance. Treat that rating as a structural limit, not a target for every cycle. A load can remain below the weight limit while still being too dense for effective cleaning.
Loading Techniques for Maximum Cleaning Efficiency
A batch can leave the tank looking clean while residue remains under a part, inside a recess, or against the basket floor. The cause is often load geometry. Parts pressed together, nested inside one another, or buried beneath a second layer create contact points and acoustic shadows, while restricting solution movement around the surfaces that need cleaning.
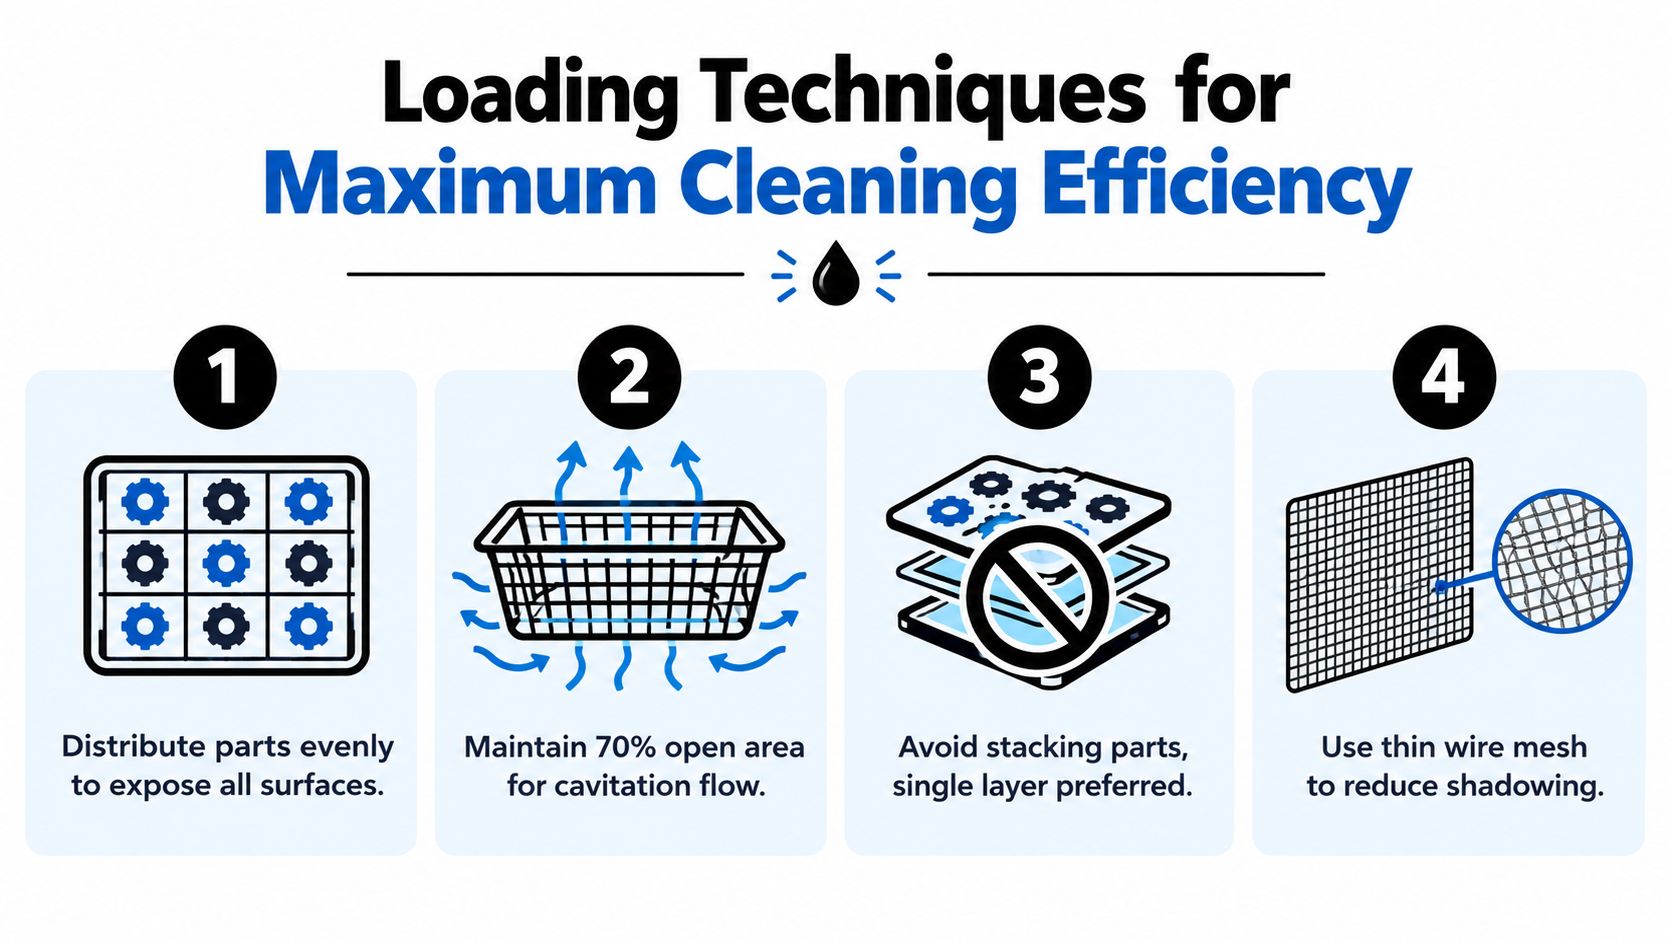
Before loading, decide which surfaces must remain exposed. A single layer with roughly 10 mm between parts gives solution and ultrasonic energy a clear route around each component. A double-stacked pile may fit more pieces into the same basket, yet the contacting faces can remain dirty after one cycle. If the load is rearranged halfway through the run and those faces then clean, the basket arrangement was limiting access rather than the cycle settings.
Arrange the load around exposed surfaces
Separate parts that can scratch, trap fluid, or shield one another. Place broad faces where solution can reach them instead of laying every piece flat on another. Hollow components need their openings positioned so air can escape and solution can enter. Orient holes, channels, and recesses toward open areas between parts, rather than toward another component or the basket base.
A fine-screen basket keeps small parts from escaping through standard mesh, but it still needs a loose arrangement. Small items packed into one dense mass can behave like a solid plug. The screen may retain the parts while limiting circulation and holding polishing compound or grease against their surfaces. Clean the insert before the next cycle instead of extending the run to compensate for restricted access. Mesh options and open-area differences should be considered alongside the actual shape and spacing of the load, as documented in Art Craft Welding documents mesh and open-area options.
Use four loading checks:
- Spread the pieces: Distribute the load instead of building a mound in the center.
- Separate contact surfaces: Use spacing, pins, or suitable partitions where parts rub or nest.
- Expose functional openings: Keep holes, channels, and recesses facing available solution paths.
- Allow drainage: Lifted parts should shed solution quickly, without pooling residue around them.
Keep protection from becoming enclosure
A dense basket can prevent small parts from escaping, while too much wire and excessive packing can reduce access to the bath. Thicker wires and dense mesh can also cast acoustic shadows over nearby surfaces, a trade-off discussed by Marlin Wire discusses mesh density and acoustic trade-offs. Choose containment that holds the parts securely without turning the load into an enclosed block.
Stacking creates the same problem. A heavy component resting on several smaller pieces can hold them in place, but it also shields the contact points. The top surface may appear clean while residue remains underneath. When one side of a part cleans well and the face touching another part does not, change the arrangement before changing chemistry, temperature, or cycle time.
Technical manuals list maximum basket loads of 3.0 kg, 5.0 kg, and 7.0 kg for different tank sizes and models in the Elmasonic X-tra operating instructions. Treat the rating as a structural limit. A load can stay below that weight and still be too dense for effective cleaning, especially when heavy parts compress smaller components into a second layer.
Inspect the first few loads under magnification when finish quality matters. Check contact points, holes, recesses, and areas resting near basket seams. Record where residue remains, then adjust spacing and orientation. That feedback connects the basket's condition and loading pattern to the cleaning result. A fouled or distorted basket can also support recontamination, so an uneven batch should prompt a basket check before the next run.
Maintaining Your Ultrasonic Cleaning Basket
A dirty basket can reverse the result of a clean cycle. Particles and residue trapped in the mesh can transfer back onto polished surfaces, while retained moisture can contribute to water marks or corrosion spots. The basket can also weaken ultrasonic transmission when contamination closes its open paths.
Independent guidance specifically identifies dirty baskets as a source of particulate transfer, trapped moisture, corrosion spots, water marks, and reduced ultrasonic energy transmission (Ralsonics explains how dirty baskets can undo cleaning). That makes basket maintenance a quality-control task, not a cosmetic chore.
Inspect the basket as part of every workflow
After removing the load, look at the mesh before returning the basket to storage. Check for oily film, dark deposits, fibers, bent wires, loose welds, corrosion, and debris lodged along the frame. Pay particular attention to corners and the basket bottom, where sediment often settles.
A practical routine includes:
- Rinse promptly: Remove solution and loosened soil before it dries in the mesh.
- Brush gently: Use a soft, compatible brush to clear openings without bending fine wire.
- Inspect the seams: Welds and folded edges can retain residue that a quick rinse misses.
- Dry completely: Prevent standing moisture from leaving marks or promoting corrosion.
- Separate dirty and clean handling: Don't place a cleaned basket on a contaminated bench or tray.
The basket should be visibly clean before it enters a fresh bath. If a rinse leaves an oily sheen or particles appear when the basket is shaken, the basket isn't ready for precision work.
Match the surface finish to the standard you need
Standard stainless mesh may be entirely suitable for workshop parts, but highly finished jewelry, laboratory components, and precision metal surfaces can expose small defects in the basket itself. Rough spots, burrs, damaged welds, or accumulated residue can mark parts during lifting and draining.
Don't ignore the maintenance method recommended for your basket material. Guidance such as the PureHQ Inc. basket maintenance advice can help teams build a repeatable inspection and cleaning routine instead of relying on occasional deep cleaning.
Replace or repair a basket when it no longer holds parts securely, when the mesh has opened, or when corrosion and residue cannot be removed without damaging the surface. A distorted basket may also change the load height and cause parts to touch the tank floor.
Clean parts deserve a clean path out of the bath.
Keep a simple record for demanding applications. Note the solution used, the load type, visible residue, and whether the basket needed extra cleaning. This makes it easier to identify whether recurring defects come from chemistry, part loading, or a basket that has become a contamination source.
Setting Up and Running Your Ultrasonic Cycle
A dependable cycle starts before the power switch. Confirm that the basket is clean, correctly suspended, and suited to the part size. Check the solution's material compatibility, fill the tank to its operating level, and follow the cleaner and chemical manufacturer's instructions for temperature, concentration, degassing, and cycle time.
Use this pre-cycle check:
- Inspect the basket and tank. Remove residue and verify that the basket won't touch the bottom or walls.
- Load with open paths. Keep parts separated where possible and avoid a dense pile.
- Prepare the bath. Mix the approved solution and allow trapped air to clear before judging cleaning performance.
- Run and inspect. Begin with the equipment's recommended settings, then check hidden surfaces and contact points after the cycle.
- Rinse, drain, and dry. Lift the basket carefully, rinse parts as appropriate, and clean the basket before residue dries.
For a fuller operating sequence, follow this step-by-step ultrasonic cleaner guide. Never reach into an operating bath, and don't use a solvent or chemical unless the equipment and work area are approved for it.
The strongest workflow treats the basket as a monitored component. If results change, inspect its cleanliness, mesh openness, suspension height, and load arrangement before increasing cycle intensity.
Evo Dyne Products offers ultrasonic jewelry cleaning solutions described for use with sonic and ultrasonic machines, alongside products for household and professional maintenance needs. Visit Evo Dyne Products to review its cleaning options and pair the right solution with a clean, correctly loaded ultrasonic cleaning basket.
