


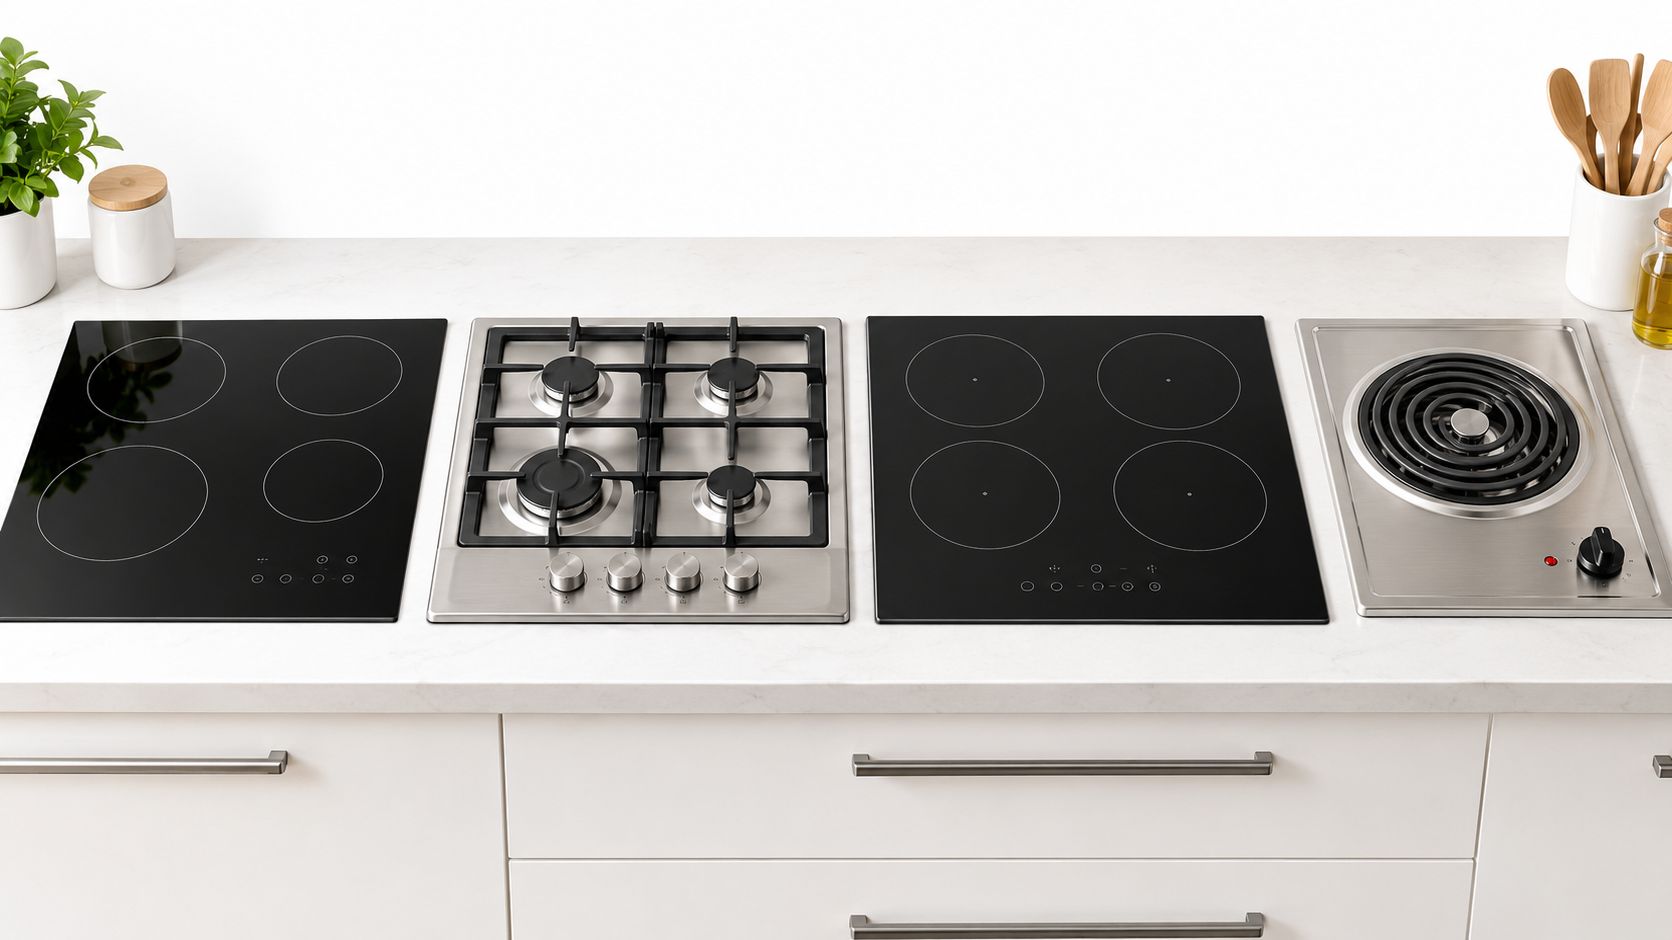
You've got a burnt ring near the burner, a streak of grease across the glass, and maybe a grate that looks worse than the stovetop itself. The common mistake is reaching for the same cleaner on every surface, then wondering why one cooktop scratches, another hazes, and a third still feels sticky after wiping. A good result starts with matching the method to the surface, because the way you clean a stove top should change with glass-ceramic, gas, or electric coil.
Understanding Your Stove Top Surface
A burnt ring on a glass top, grease under gas grates, and residue around a coil base all call for different handling. The quickest way to scratch a cooktop or leave it looking cloudy is to use the same pressure and the same cleaner everywhere.
Start by identifying what you're actually cleaning
Look at the surface before you reach for a sponge. Glass and ceramic tops need a gentle approach because rough pads and dry scraping can leave marks that do not come out. Use non-scratch pads, keep the razor at a low angle on a wet surface if scraping is necessary, and follow a surface-specific glass and ceramic care guide for stubborn buildup.
Gas units need a different workflow. You are cleaning around grates, burner caps, igniters, and seams, so the job is as much about careful disassembly and drying as it is about wiping. Keep igniters dry, lift grates off before scrubbing, and clear grease from the edges where it collects.
Coil stoves have their own weak points. Lift the coils only as the manual allows, avoid wetting the terminals, and clean the drip areas separately so moisture does not sit where it can cause trouble later.
Practical rule: Match the method to the material. If a surface can scratch, trap water, or hide electrical parts, treat it differently.
Why one-size-fits-all advice breaks down
“Warm soapy water” sounds harmless, but it misses the trade-offs that matter on real appliances. A glass cooktop wants a soft touch. Gas needs careful drying around the base. Coil units need attention around exposed hardware and connectors. The right method is simpler than a blanket routine, and it prevents damage that shows up after the first bad cleaning.
That is why surface-specific guidance matters more than a generic cleanup tip. The shift toward purpose-built cleaners and smoother kitchen materials helped change how people maintain cooktops, and the same lesson still applies now, use the cleaner and the motion that fit the surface American Cleaning Institute historical timeline.
Preparing the Cooking Area Safely
A good cleaning starts before any cleaner touches the surface. Heat, moisture, and loose debris can create avoidable problems, especially on cooktops with igniters, exposed coils, or control gaps.
Cool first, then clear everything off
Let the stove cool completely before you use water or cleaner. On glass and ceramic tops, that prevents thermal stress and keeps you from trapping heat under a wet cloth. On gas and coil units, it also gives you a safer starting point around hardware that holds heat longer than the surface around it.
Once the top is cool, remove the parts that are meant to come off. Grates, burner caps, trivets, drip pans, and coils should be set aside and cleaned separately, so you are not dragging grease across the appliance while you work. Keep the order simple. If a part lifts out cleanly, take it off before you start wiping the main surface.
Set up your tools before you touch the surface
Have soft cloths, a non-scratch sponge, mild dish soap, and the right cleaner within reach. For gas stoves, keep water use light near the base. For coil tops, avoid saturating connectors or terminals. Spraying cleaner onto a cloth gives you more control than misting hardware directly, and it reduces the chance of excess liquid pooling where it should not.
The Consumer Product Safety Commission gives the same basic guidance in practical terms, keep stovetops free of grease and dust and keep water away from igniters and electrical parts CPSC stove safety guidance.
- Cool the cooktop fully.
- Turn off the gas or power source before disassembly.
- Remove loose parts and set them aside.
- Spray cleaner onto a cloth, not directly onto hardware.
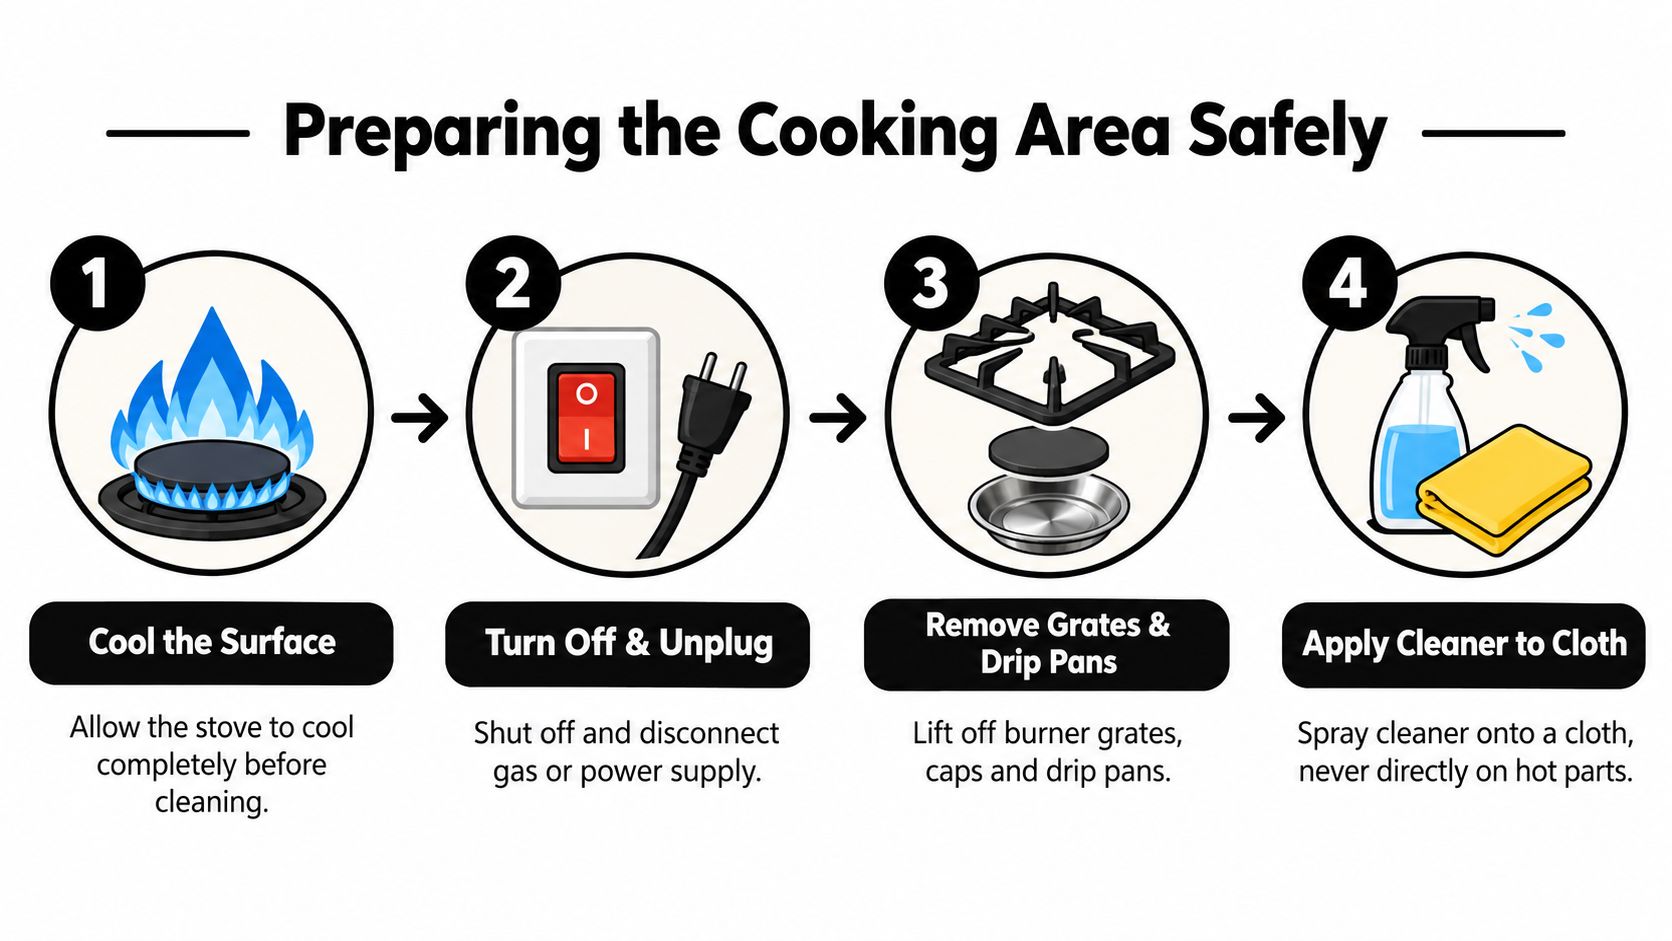
This setup matters because it keeps the work area controlled. Once the loose pieces are out of the way, you can clean the surface without pushing grime into seams, burner openings, or control spaces.
Cleaning Procedures by Stove Type
A clean stovetop depends on matching the method to the surface. Glass can scratch under pressure, gas burners retain moisture around ports, and coil tops contain electrical connections that need careful handling. Each type needs its own workflow.
Glass and ceramic cooktops
Use a dedicated glass-cooktop cleaner for routine soil. For dried spots, spread a thin baking-soda paste or cooktop cream, allow roughly 2 to 3 minutes of dwell time, then lift the residue with a soft cloth or non-scratch pad. The short wait loosens the spill and reduces the need for aggressive scrubbing.
A single-edge razor blade holder can remove stubborn buildup when the surface is wet. Keep the blade at a low angle and move it across the residue rather than digging into one area. Never scrape a dry top. For a surface-specific method, this glass cooktop guide offers useful guidance before testing a new product.
Gas stovetops
Gas parts clean more effectively when the removable pieces are handled separately. Take off the grates and burner caps, soak them in warm soapy water for about 10 minutes, and use a soft brush for residue around the openings. Wipe the cooktop base with mild detergent and a lightly wrung sponge, keeping water away from burner ports and igniters.
Drying determines whether the job is finished. Let grates and caps dry fully, then check that ports are clear before replacing them. If grime remains under the grates, repeat the soak instead of using an abrasive pad. The material-matching principle also applies to related surfaces, as shown in these marble stain removal नुस्खे.
Electric coil stovetops
Coil units require careful removal and reassembly. Lift each coil only as the appliance manual directs, then clean the exposed surface with mild cleaner and a non-abrasive pad. Remove and wash drip pans separately, since grease often collects there rather than on the visible cooktop.
Allow the drip pans and surrounding surfaces to air-dry for about 15 minutes before reassembly, and confirm that coil terminals are dry. Rushing this step can cause poor contact or later malfunction. Evo Dyne Products’ heavy-duty all-purpose cleaner is one household product option, but its label directions and the appliance's surface limits still govern how it should be used.
Tackling Tough Stains and Grease
Burnt residue is usually a timing problem, not a “needs stronger chemicals” problem. Once grease hardens, the goal is to soften it without wrecking the finish, and that means using dwell time instead of force.
Use a paste, not pressure
A baking soda paste spreads over the stain and gives you a mild abrasive action without the damage that steel wool causes. Let it sit long enough to loosen the residue, then wipe gently. If the spot still holds on, a light vinegar spray can help break down the mess and make the paste easier to lift away.
The state housing cleaning guidance is straightforward here, let the surface cool, wipe loose crumbs first, then use warm soapy water or diluted vinegar, and for stuck-on residue, a 10 to 15 minute vinegar-and-baking-soda dwell time is recommended before gentle wiping NY stove and oven cleaning guide. That approach is especially useful on smooth tops where scratches show up fast.
Clean removable parts separately
Burner caps, grates, and similar parts do better when soaked on their own. Warm water and mild dish soap will often loosen the heavy grease enough that the final wipe is easy instead of exhausting. That's also where a non-toxic heavy-duty cleaner can make sense if you're comparing formulas, and a resource like choosing a non-toxic heavy duty cleaner can help you think through the trade-offs before you buy.
Grease doesn't usually need more force. It needs more time, better contact, and the right tool for the finish.
The wrong tools are easy to spot. Steel wool, harsh powders, and dry scrubbing leave visible damage on glass and enamel much faster than expected. If you are cleaning a heavy mess, soak first, wipe second, and only escalate when the surface permits.
Safety and Fire Prevention Considerations
A stovetop covered in grease is a fire concern, not just a cleaning problem. Grease, crumbs, and splatter leave combustible material close to burners, heating elements, and hot cookware. Surface type changes the cleanup method, but every stove benefits from removing buildup before it accumulates.
Why cleanup lowers risk
Industry reporting based on NFPA 96 guidance recommends cleaning kitchen exhaust systems serving moderate-volume operations semiannually, high-volume operations quarterly, and low-volume operations annually. The same report cites 7,410 average structure fires per year in eating and drinking establishments from 2010 to 2014. 59% began in the kitchen or cooking area, cooking equipment was involved in 61% of incidents, and ranges and cooktops accounted for 14% of restaurant fire incidents during that period grease management and fire data.
Those figures describe commercial kitchens, but the practical lesson also applies at home. Gas grates, coil drip pans, and the edges of induction surfaces can all collect grease, even though each requires a different cleaning approach. Remove residue from the areas that heat up, rather than letting repeated spills form a thicker layer.
CPSC guidance similarly stresses grease removal and careful handling around stove components CPSC stove safety guidance.
Treat fire prevention as part of the cleaning job. Clear crumbs and grease from beneath removable parts, around controls, and along the cooktop perimeter. If a spill ignites, turn off the heat if it is safe to do so, keep the lid nearby for a pan fire, and never use water on burning grease.
Establishing a Maintenance Routine
The easiest stove to clean is the one you never let get fully filthy. A little routine beats a big rescue job, especially on surfaces that punish over-scrubbing.
Build cleaning into the end of cooking
A quick wipe after the stove cools, but before residue hardens, keeps messes manageable. On gas and coil units, that also means catching spills before they settle into seams, around burner parts, or beneath removable hardware.
For the broader kitchen, it helps to fold stove care into the same habit loop you use for other daily reset tasks. If you already follow a plan to manage dust and pet hair, adding a stove wipe to that rhythm feels much less like a separate chore. The point is consistency, not perfection.
Use a simple weekly reset
A weekly deeper clean is usually enough for most homes, with more frequent attention if you cook heavily or use the stove every day. Keep the routine surface-specific, glass gets a non-scratch polish, gas gets part-by-part cleaning, and coils get careful removal and drying.
A practical maintenance flow looks like this.
- After each use: wipe spills while the surface is safe to touch.
- Once a week: remove loose parts and clean them separately.
- As needed: treat burnt-on spots before they become permanent.
That schedule keeps grime from getting ahead of you, and it protects the appliance too. A cooktop that stays free of grease and dust is easier to clean, easier to inspect, and less likely to turn a small spill into a bigger problem.
If you want cleaning products that fit into a practical home-care routine, visit Evo Dyne Products and compare the options they offer for household cleaning, maintenance, and surface care. Their product range includes cleaners and care solutions that can support the kind of routine that keeps a stove top cleaner, safer, and easier to maintain.
