

You're standing in front of a dull fridge door, a cloudy sink, or a tool with orange spots, holding a can that says stainless. The shelf next to it holds five more cans with the same word and very different promises. That confusion is normal, because stainless steel spray isn't one product. It's several kinds of film, and picking the wrong one can leave you with shine, sticky residue, or rust that keeps spreading underneath.
Table of Contents
- Which Stainless Steel Spray You Actually Need
- The Passive Film a Spray Cannot Copy
- How to Match a Spray to Finish and Place
- Where People Use Stainless Steel Spray
- How to Apply Stainless Steel Spray Safely
- Chlorides Pitting and Maintenance Mistakes
- Air Food Kids and Pets After You Spray
- Test a Hidden Spot Then Commit
Which Stainless Steel Spray You Actually Need
Start with the job, not the label. Do you want to restore shine, resist fingerprints, slow rust, or fake the look of stainless on ordinary metal? Each answer points to a different row below, and no row does all four jobs well.
| Spray type | Main job | Typical film | Best surfaces | Will not do |
|---|---|---|---|---|
| Cleaner-polish | Lift prints, spots and haze | Solvent plus mild surfactant or fine polish, thin sheen | Appliance doors, hoods, indoor trim | Fill pits or stop active rust |
| Oil, wax or silicone protectant | Slow new fingerprints and water beading | Clear oil, wax or silicone | Brushed fridge panels and indoor metal | Survive heavy washing or accept later paint |
| Corrosion inhibitor | Slow flash rust on bare or scratched metal | Oil plus a film-forming inhibitor | Tools, outdoor fixtures, shop equipment | Replace paint or marine-grade protection |
| Stainless-look coating | Make ordinary metal look like stainless | Pigmented acrylic or metallic aerosol | Crafts, decorative indoor panels | Become 304 steel or handle oven and dishwasher heat |
| Weld-tint or heat-mark remover | Strip heat color after welding | Acid chemistry, shop use only | Fabricated stainless labeled for that alloy | Casual home use or food contact before neutralize and rinse |
The Everyday Cans
A cleaner-polish is what most kitchens need. It lifts fingerprint oil, water spots, and light haze from appliance doors, range hoods, and indoor trim, then leaves a thin sheen that makes the next wipe easier. It doesn't fill damage. If you can feel a pit with a fingernail, polish will darken it and move on.
An oil, wax, or silicone protectant goes a step further on brushed panels that show every touch. Indoors, that clear film can hold for days and makes water bead instead of spotting. It washes off with soap, though, and silicone is a real problem if you plan to paint that panel later, because paint struggles to stick to it.
The Shop and Project Cans
A corrosion inhibitor is for tools, outdoor fixtures, and bare scratches where orange flash rust appears overnight. It slows that process by keeping air and moisture off the metal for a while. It doesn't turn carbon steel into stainless, and it isn't a substitute for paint on a railing or a boat fitting.
A stainless-look aerosol is paint with metallic pigment. It's fine for crafts, picture frames, and indoor panels that never get hot or wet for long. It won't take oven heat, a dishwasher cycle, or lemon juice the way real 304 stainless does, because underneath the color it's still a resin film on ordinary metal.
Weld-tint removers sit in a different category entirely. They're acid products for heat color on fabricated stainless, and they belong in a shop where you can neutralize and rinse fully. They don't belong in a kitchen drawer next to the dish soap.
Practical rule: Shine alone isn't protection. A panel can look perfect under kitchen light and still have no film left after one soapy wash.
If you're comparing longer lasting finishes for a panel that gets handled daily, it's worth looking beyond aerosols at coating options for polished stainless steel to see how a purpose built coating differs from a wipe on sheen. For most homes, though, the honest choice is simpler. Pick the row that matches your job, and don't ask a polish to do a coating's work.
The Passive Film a Spray Cannot Copy
Think of real stainless steel as metal with a self-healing skin. When chromium in the steel meets air, it forms a thin, invisible oxide layer at the surface. Scratch it lightly, and fresh chromium at the scratch reacts with air and rebuilds that layer. That's why a good stainless sink can look tired one day and, after a wash and dry, look sound again. The protection lives in the metal itself, not on top of it.
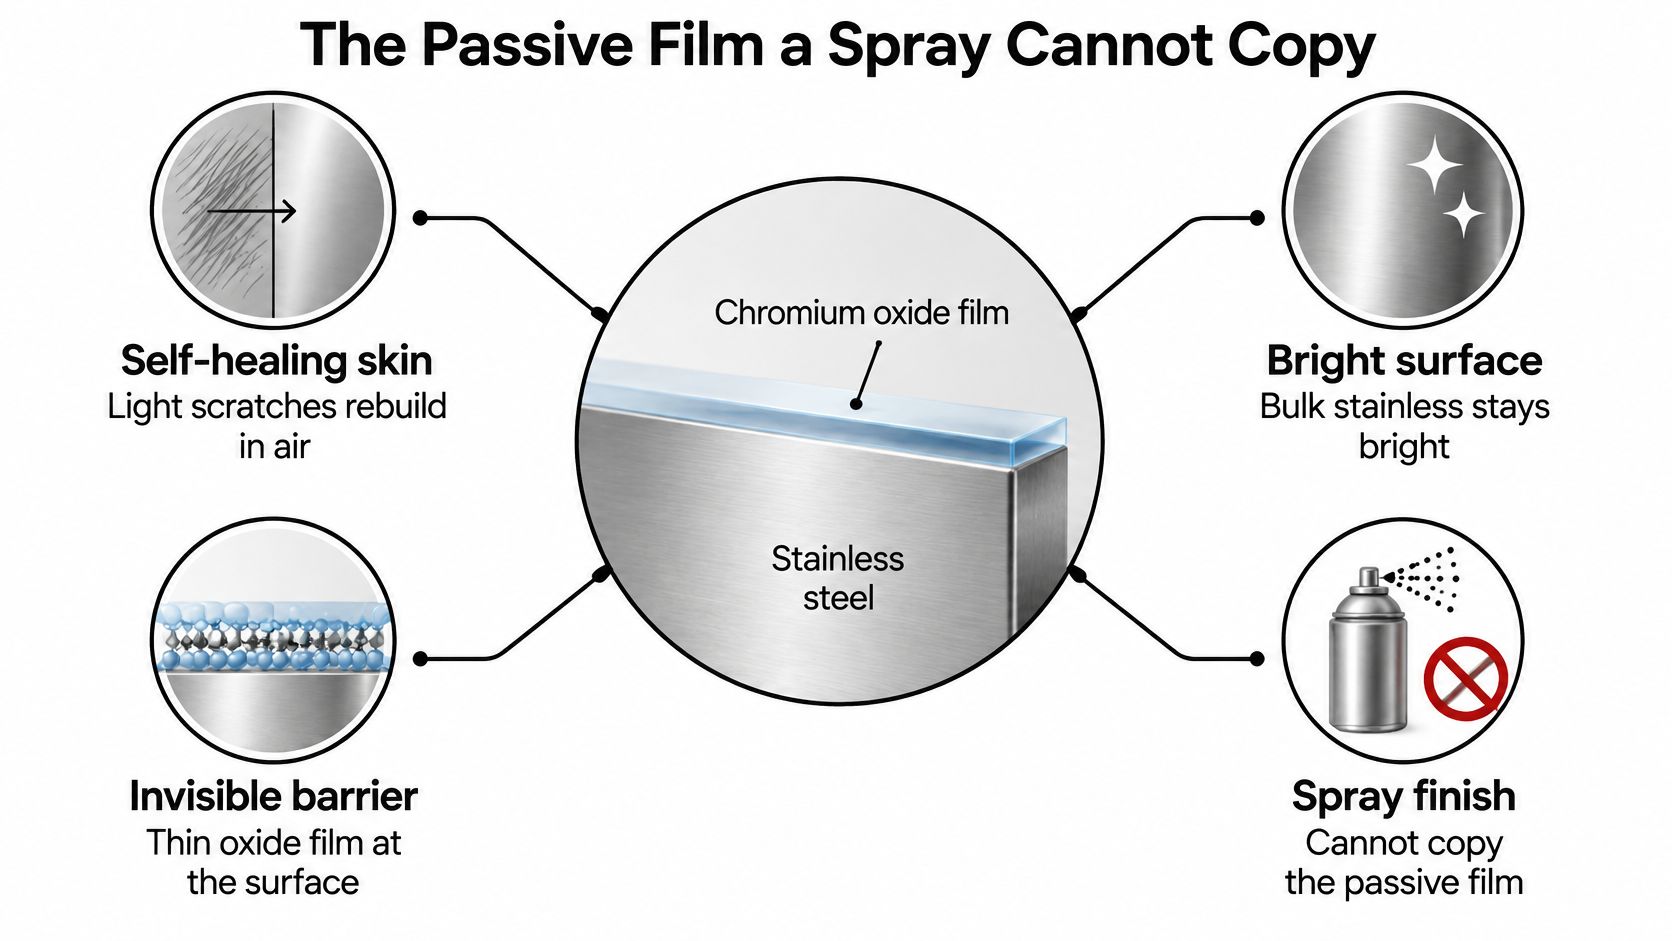
That skin needs enough chromium to form in the first place. The British Stainless Steel Association history of stainless steel notes the foundational threshold is at least 10.5% chromium by mass, enabling a thin, passive oxide layer that sharply reduces rusting and tarnishing. In 1911, German researchers Philip Monnartz and W. Borchers reported a major improvement in corrosion resistance at approximately 10.5% chromium. On August 13, 1913, English metallurgist Harry Brearley produced an early true stainless steel containing 12.8% chromium and 0.24% carbon.
What a Can Actually Lays Down
A spray can't copy that metallurgy. It only deposits what's in the can, whether that's oil, wax, silicone, resin, or pigment, as a separate film sitting on the surface. If that film wears through, cracks, or never stuck properly because the surface was greasy, the metal underneath is back to whatever it always was.
Say you spray a stainless-look coating over a mild steel bracket for a garage shelf. It looks convincing on day one. Then a toolbox scrapes the edge, the film chips, and humid air reaches bare steel at that chip. Rust starts there and can creep under the surrounding paint. Real stainless would have rebuilt its oxide skin at a light scratch. The painted bracket can't.
Household humidity rarely beats a healthy passive film. Chloride contamination, acids, constant abrasion, and dirt trapped against the surface can, which is why coastal railings and pool areas need more attention than a hallway handrail. If you're dealing with outdoor metal, understanding stainless steel railing corrosion helps explain why location changes how often you need to wash and inspect.
So judge any can by film behavior, not by the word stainless on the front. Does it adhere to your surface, resist wiping and light abrasion, and hold up in humidity? Or does it only shine until the next wash? The label color proves appearance. It doesn't prove protection, and it never changes the substrate into chromium stainless.
How to Match a Spray to Finish and Place
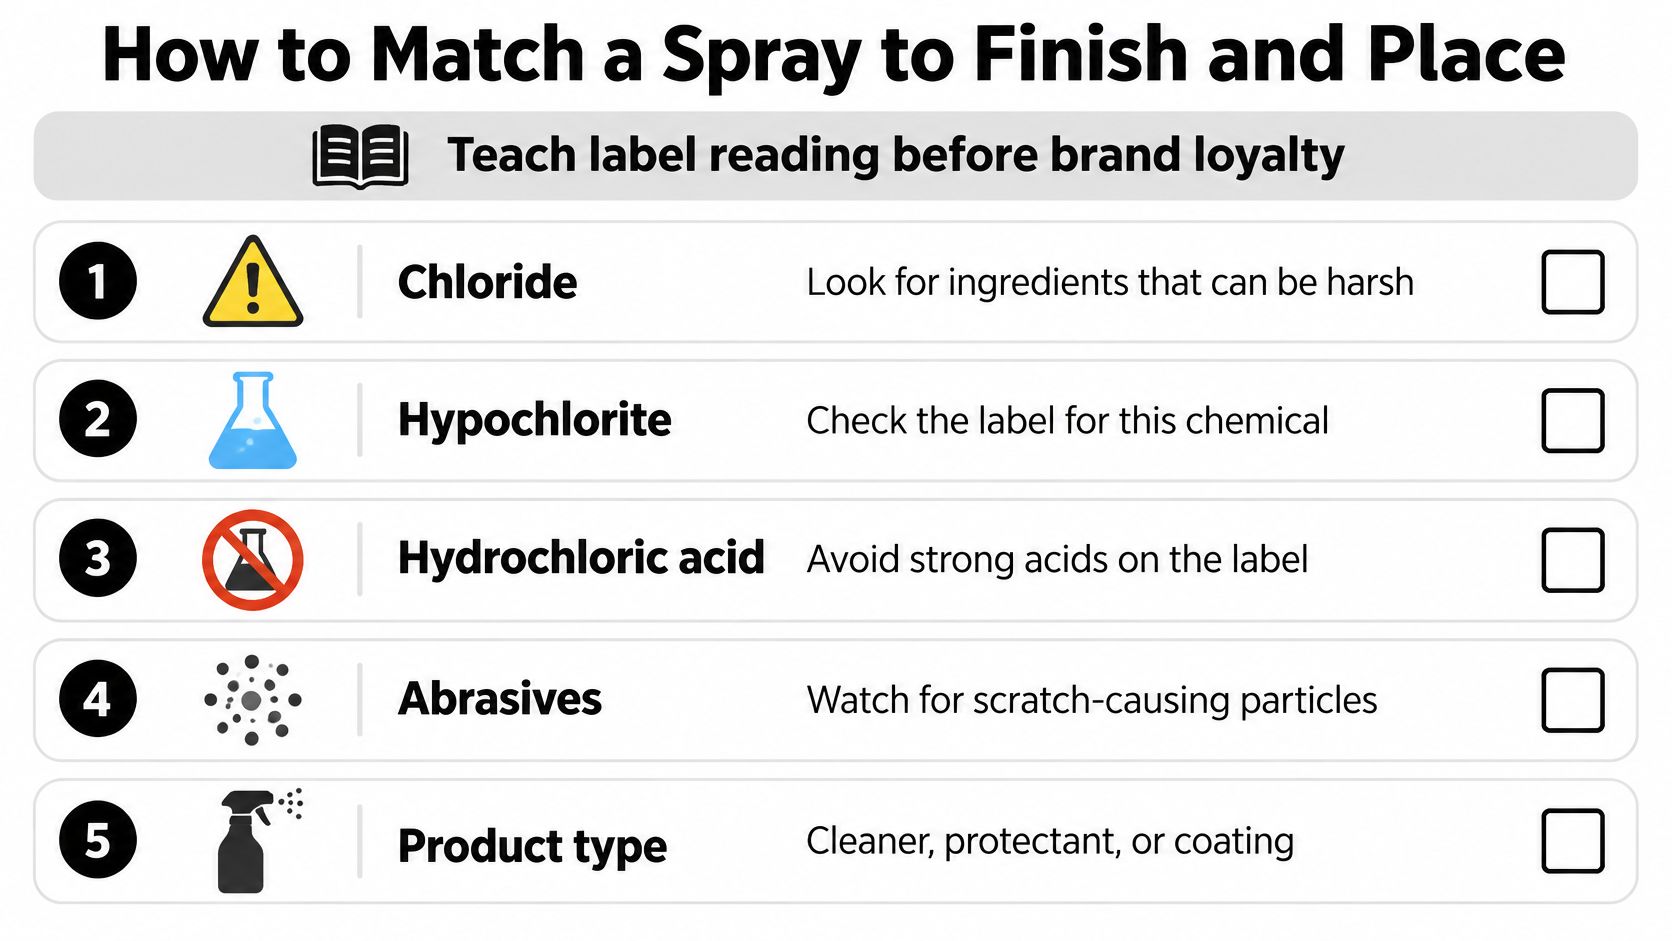
Read the label before you trust the brand. Look for four words that should make you pause on decorative stainless: chloride, hypochlorite, hydrochloric acid, and abrasives. Then confirm what the product is, a cleaner, a protectant, or a coating, because those jobs don't swap cleanly. If you want a plain breakdown of typical ingredients before you buy, this guide to what is in stainless steel cleaner walks through common components in everyday terms.
A spray that looks like stainless doesn't make the part 18/8 stainless. The World Stainless basic facts guide credits Dr. W. H. Hatfield in 1924 with developing the 18/8 formulation, approximately 18% chromium and 8% nickel, associated with widely used austenitic grades. In that metal, nickel helps stabilize the structure and contributes to toughness, formability, and broad corrosion resistance. None of that transfers through a surface film. Judge a coating instead by adhesion, abrasion resistance, chemical resistance, film thickness, and performance in humidity or salt exposure.
| Surface | Prefer | Avoid |
|---|---|---|
| Mirror appliance door | Light cleaner-polish, then a dry lint-free cloth | Abrasive pads and bleach left to dry |
| Brushed fridge or range | Spray onto the cloth and wipe with the grain | Circular buffing and silicone if you will paint later |
| Sink, cookware, food-service gear | Mild soap, rinse and dry; food-area product only if the label allows | Chloride cleaners and concentrated bleach |
| Exterior auto trim | Protectant rated for outdoor metal | Overspray on plastic, paint and rubber |
| Bare carbon steel meant to look stainless | Stainless-look coating after cleaning and prep | Polish wiped over active rust |
| 304 or 304L fixtures | Neutral cleaner, prompt rinse and dry | Bleach at 5 percent or stronger, especially if it dries on the metal |
Finish Changes the Technique
Mirror finishes show scratches instantly, so use a soft cloth and skip pads entirely. Brushed finishes hide small marks but punish circular wiping, which leaves visible arcs across the grain. Always wipe with the grain on brushed doors and ranges.
Grade matters too. Series 200, 300, and 400 stainless don't all respond the same to chemicals and heat, and 304, the common appliance and sink grade, still pits if chlorides sit on it.
Before you commit to a whole door, test a hidden corner. Let it dry fully, then check for haze, rainbowing, staining on nearby plastic, and whether water sheets flat or beads. That two minute test tells you more than the front of the can.
Where People Use Stainless Steel Spray
Most mistakes happen because the place invites the wrong product. The metal looks similar in a kitchen, on a truck, and in a shop, but the dirt, heat, and chemicals around it aren't similar at all.
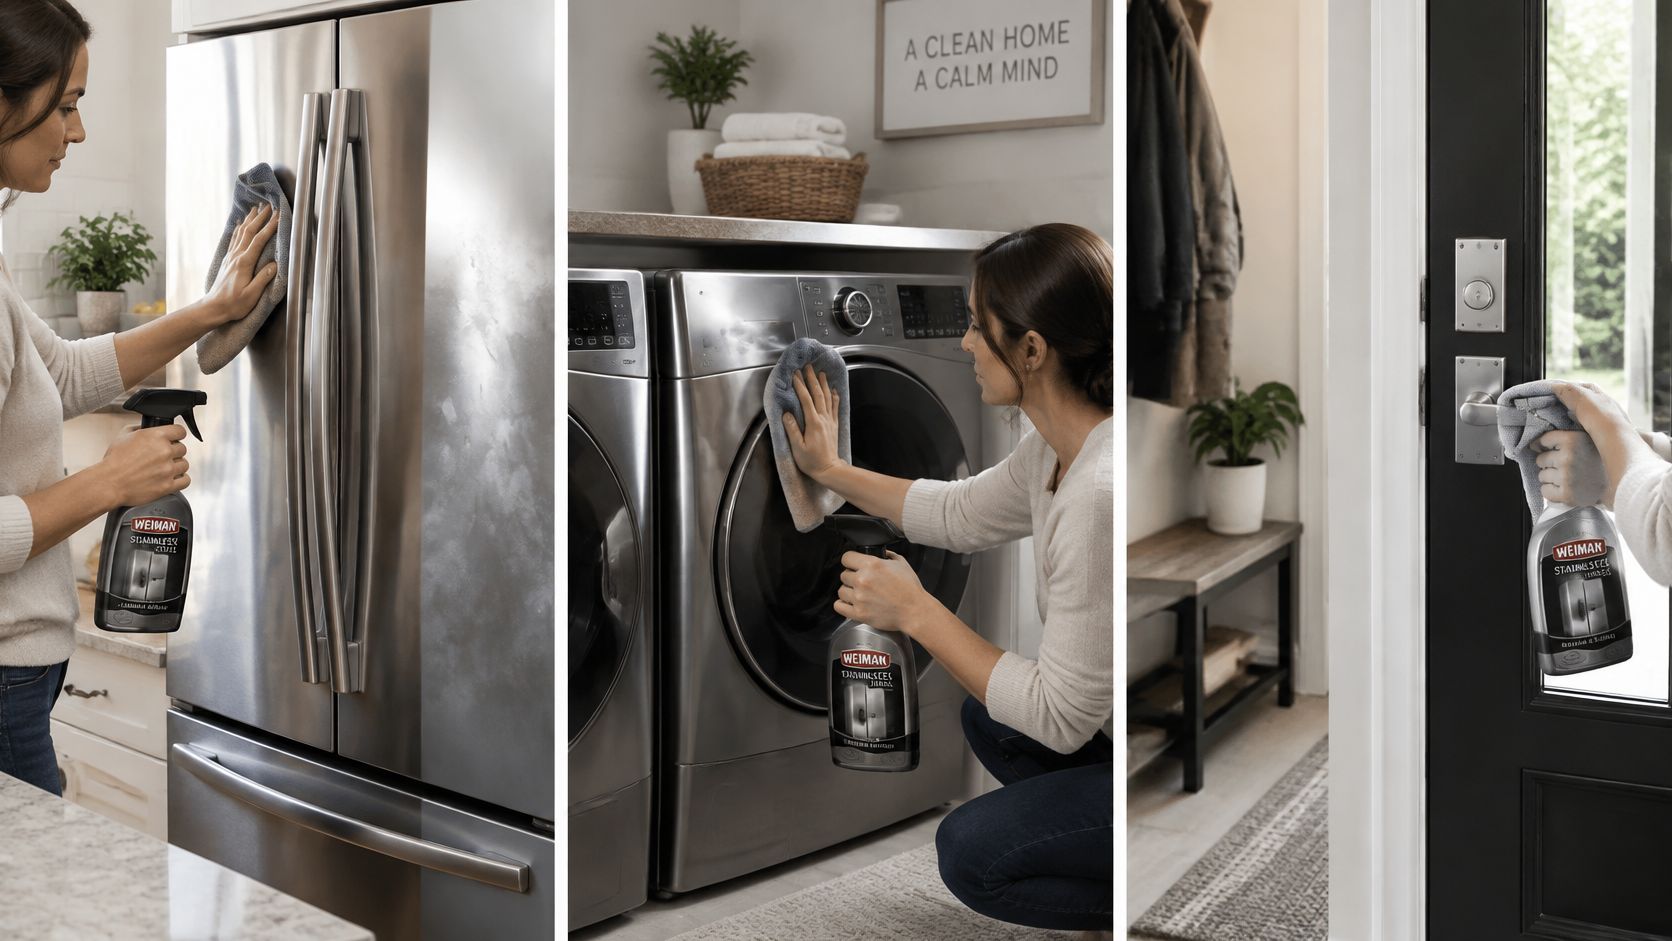
The photo below shows the most familiar version of this job, a cleaner-polish used on large household surfaces where fingerprints are the whole problem.
In the Kitchen
Fingerprint haze on a French-door fridge is usually hand oil plus dust, not failing steel. A cleaner-polish on a cloth, wiped with the grain, restores the look in minutes. That same can sprayed carelessly can haze a black glass cooktop edge or stain a plastic handle, so mask or shield those borders with your free hand or a piece of cardboard.
A sink that looks cloudy after a harsh disinfectant is a different story. It may already have tiny pits. Polish can even out the color and make it look better under the light, but the pits stay, and they'll catch dirt faster than the smooth metal around them.
On a Vehicle
Stainless trim, exhaust tips, and toolbox lids collect brake dust and road film that a normal wash leaves behind. A metal protectant labeled for exterior use can refresh them, but overspray on adjacent paint, plastic, and rubber is the common stain people create while fixing the trim. Spray the cloth, not the part, and keep the product off dash vents and seals inside the cab. Those interior pieces aren't the target, and they don't forgive oily films.
This short demonstration shows the cloth-first technique on a household surface, which transfers directly to trim work.
In the Shop
Stored hand tools and stainless guards do well with a light protectant or inhibitor that keeps fingerprints and damp air off the surface between uses. Weld heat tint on a new bracket is not a polish problem. It's a fabrication finish issue, and acid tint removers are only for people set up to neutralize and rinse properly.
Decorative stainless-look paint belongs on primed crafts and indoor panels. It doesn't belong on a griddle, a marine fitting, or anything that sees food acids and scrubbing.
The failure that repeats in all three places is the same. Someone aimed the spray at the look, while the damage was chloride residue, heat tint, or bare steel underneath.
How to Apply Stainless Steel Spray Safely
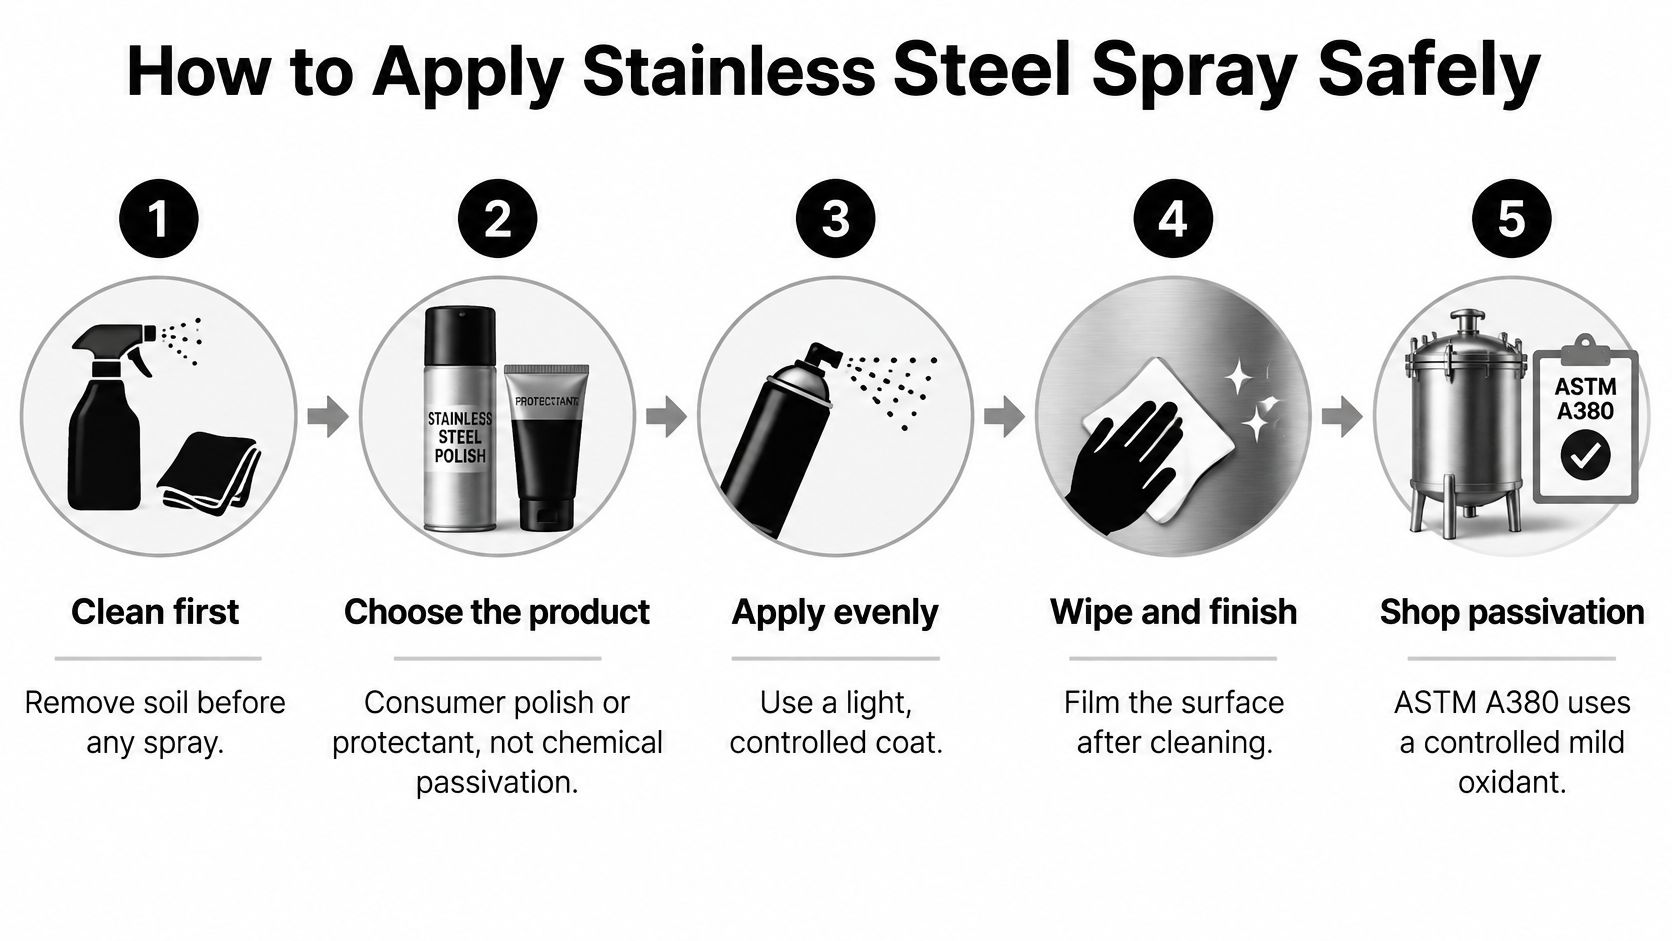
Treat application as two jobs in order: clean first, film second. A consumer polish or protectant is not chemical passivation, and confusing the two leads to bad expectations. The ASTM A380/A380M standard defines passivation as treatment with a mild oxidant, such as nitric acid, to enhance spontaneous formation of the protective passive film, after oil, scale, and embedded iron are removed and followed by thorough rinsing. That's controlled shop work for specified alloys, verified with tests such as water immersion, humidity, salt spray, copper sulfate, or ferroxyl testing. It isn't a kitchen aerosol routine.
The Home Routine in Order
- Read the can first: Check food-contact limits, warnings for plastics and painted surfaces, and ventilation directions.
- Clear the area: Move food away, keep kids and pets out, and open a window or run exhaust.
- Wash with mild soap: Use dish soap and warm water to lift oil, dust, and old product.
- Rinse the soap off: Dried soap under a new film becomes streaks you can't buff out.
- Dry fully: Use a lint-free cloth, because trapped water under a film spots the metal.
- Shake if directed: Some products need it, some don't, so follow that specific label.
- Spray the cloth, not the air: Apply to the cloth and wipe with the grain on brushed metal, keeping liquid out of seams.
- Buff with a dry section: Flip the cloth and remove haze before it sets.
- Let it dry before food contact: Rinse food-prep surfaces when the label requires it, then dry again.
- Check one panel first: On a large appliance, finish one door and look at it under ordinary light before doing the rest.
Spraying into upright seams lets liquid run under a door gasket, where it sits wet against metal you can't wipe. The cloth method prevents most of that.
Slips That Create New Problems
- Stacking coats: Extra layers feel sticky, grab dust, and look worse than one thin film.
- Reusing an oily cloth on glass: You'll smear the glass and blame the glass cleaner.
- Skipping the wash: New film over old oil locks in fingerprints instead of removing them.
Keep the spray off plastic, painted, and other hard surfaces nearby, since it can stain them. If your job is welded stainless that must meet a specification, don't judge by shine. Specify the alloy, pre-cleaning method, dwell time, rinse-water quality, and a real acceptance test, or hand it to a shop that does.
Chlorides Pitting and Maintenance Mistakes
Stainless doesn't mean you can spray anything on it and walk away. Risk changes with grade, finish, heat, chemical strength, and how long a chemical sits on the surface. The British Stainless Steel Association care and maintenance guidance warns that chloride-containing products, including bleach and hydrochloric-acid cleaners, can cause staining, pitting, or corrosion, that concentrated bleach should never contact decorative stainless steel, and that even diluted bleach should be rinsed promptly. For common 304/304L, it reports bleach concentrations of 5% or more can cause corrosion at room temperature, especially when the solution dries and becomes more concentrated.
That surprises people because bleach feels like the serious, sanitary choice. On stainless, a long soak can be the damaging choice, while a mild wash, a prompt rinse, and a dry cloth protect the surface you're trying to sanitize.
Stains You Can Wipe and Pits You Can't
A brown tea stain or water mark on the surface often wipes or polishes away. A pit is a tiny hole in the metal itself. Polish can darken it, lighten the area around it, and make the panel look better from three steps back, but it can't put metal back. If pits feel rough to a fingernail, no household spray reverses them. Your real options are living with the texture, professional refinishing, or replacement. For sink-specific care that stops short of damage, this guide to stainless steel sink polish covers gentler routines.
Other slow damage comes from ordinary habits:
- Steel wool and carbon-steel scrapers: They plant tiny iron particles that rust and make it look like the stainless failed.
- Wet sponges left in the sink: They hold salty, soapy water against one spot for hours.
- Pool and salt exposure: Outdoor fixtures need more frequent plain washing than indoor ones.
Maintenance That's Boring and Works
Wipe spills the same day. Rinse off food acids and any cleaner, then dry with the grain so water doesn't sit and concentrate whatever it carried. Reapply a protectant only when water stops beading or fingerprints start showing again, and never layer fresh oil over a dirty film. Wash first, every time.
Counterintuitive but true: A stronger disinfectant left to soak often harms stainless more than a weaker cleaner that's rinsed and dried right away.
Outdoors, plan on washing more often than you wash a fridge. Salt air and rain don't damage the metal by themselves as much as the residue they leave behind when they dry.
Air Food Kids and Pets After You Spray
Most cans sell shine and fingerprint resistance. They say much less about what stays in the room air or on the counter after you've finished, and that's the gap worth closing before you spray near a cutting board or a pet bowl.
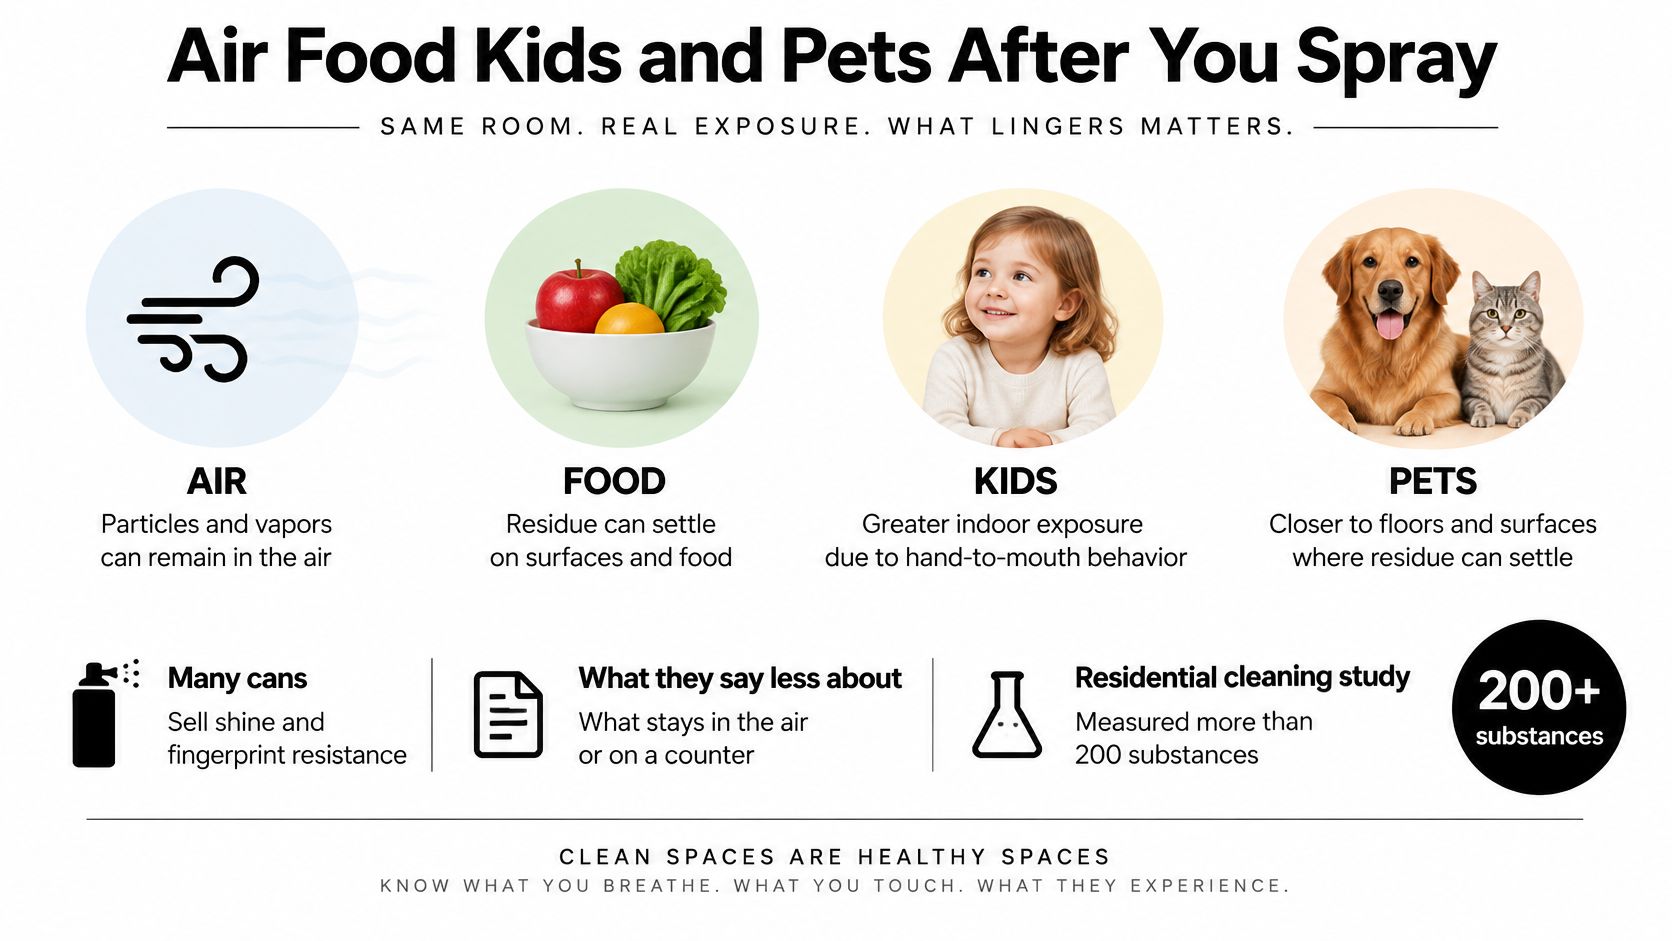
A residential monitoring study of cleaning and indoor air measured more than 200 volatile organic compounds and 52 semivolatile compounds during cleaning, and after professional cleaning concentrations increased for roughly 60% of VOCs and 80% of SVOCs, with some lower-volatility compounds persisting for more than five hours. Separate 2025 environmental research cited alongside it reported median concentrations for some cleaner-associated chemical groups of approximately 2 to 5 mg/m³ indoors versus 0.2 to 0.5 mg/m³ in incoming air.
That doesn't make every stainless steel spray hazardous. It does mean ventilation and application method are part of using the product well, not optional extras.
Practical Habits for a Lived-In Room
- Spray the cloth, not the room: You put far less product into the air and more of it on the metal.
- Ventilate while you work: Crack a window or run the hood or bathroom exhaust until the smell drops.
- Keep kids and pets out: Let them back when the surface is dry, not while it's wet and interesting.
- Clear food and bowls first: Don't spray over open food, bottles, pet dishes, or cutting boards.
- Rinse when the label says so: Food-prep surfaces get a rinse and dry before use.
Fragrance-free doesn't automatically mean residue-free or risk-free, and words like natural or non-toxic on the front of a can are weaker evidence than the ingredient list and directions on the back. Read those first.
If you have asthma, or you're working in a closed RV, van, or small bathroom, treat airflow as essential and consider wiping with soap and water alone when shine isn't essential. Store the can away from heat and out of reach, and never use it as a room freshener.
Test a Hidden Spot Then Commit
You can decide today with a simple if-this-then-that check. If fingerprints on a fridge or hood are the problem, buy a cleaner-polish and skip coatings. If prints return overnight on a brushed indoor panel, a protectant is your row, reapplied when beading fades.
If the metal is bare steel or a stored tool showing flash rust, an inhibitor or a real coating is the honest product, not a shine spray. If the part is a sink, pan, or food line, prefer soap, rinse, and dry unless the label clearly allows that surface, and never leave bleach to dry on it.
If weld color or deep pits are your complaint, stop and reassess. A polish won't fix fabrication heat tint or restore pitted texture, and more spraying only delays the needed repair.
Before the whole door or trim strip, test a hidden corner. Wait until it's dry, then check the metal and the plastic, paint, and glass nearby. Then clean, dry, wipe with the grain, ventilate, and keep food, children, and pets off the wet film. Revisit the surface when water no longer beads or prints return, instead of stacking coats. That sequence protects the finish you have, rather than pretending a spray is new stainless steel.
If you're ready to care for stainless and other metal surfaces with products built for real home and shop use, visit Evo Dyne Products to explore our home cleaning essentials, premium industrial fluids, and cutting oils suited to stainless steel and other metals. You'll find practical how-to guidance alongside the products, so you can match the right solution to your fridge, sink, tools, or workshop equipment.