

Yes, you can use Windex on stainless steel if it's the ammonia-free formula that names stainless steel on its label, and you should check the label on any other Windex variant before using it. Never use bleach, chlorine, or hydrochloric acid cleaners instead, and treat that label check as the deciding step.
Why do two bottles with the same brand name get different answers? That's the gap most advice misses. You're not really asking about a brand. You're asking about a specific formula, how long it sits on the surface, and whether residue stays behind in seams after you walk away.
Table of Contents
- Which Windex Formulas Are Safe on Stainless Steel
- Why the Label and Residue Decide the Answer
- How to Clean Stainless Steel With Windex Step by Step
- Sinks, Fridges and Cookware Need Different Care
- Safer Alternatives for Everyday and Stubborn Marks
- Fixing Streaks, Haze and Spots on Stainless Steel
Which Windex Formulas Are Safe on Stainless Steel
One bottle in the Windex line gets a clear yes on stainless steel; every other bottle gets a conditional answer. SC Johnson's official Windex guidance specifically recommends its Ammonia-Free Glass Cleaner for stainless steel surfaces, along with glass, chrome, plastic, and vinyl. That approval applies to that formula only.
The reason is simple: Windex covers several formulas, each with its own chemical composition. A variant cleared for glass can carry ingredients the stainless label never approves, so two bottles with the same logo can behave very differently on a fridge door. The printed label on each bottle decides.
Which Cleaners Are Safe on Stainless Steel
| Cleaner | Safe on stainless? | Condition | Reason |
|---|---|---|---|
| Windex Ammonia-Free Glass Cleaner | Yes | Use as labeled, spray onto cloth, wipe with grain | Manufacturer names stainless steel on its guidance |
| Other Windex formulas | Conditional | Use only if the product label specifically lists stainless steel as a safe surface | Formulas differ, so each label decides |
| Mild dish soap and warm water | Yes | Rinse with clean water and dry fully | Gentlest routine option with no chloride |
| Stainless-specific cleaner | Yes | Follow the product label | Formulated for the finish |
| Bleach or chlorine cleaner | No | Never use | Chlorides break the passive film and cause pitting |
| Hydrochloric acid cleaner | No | Never use | Causes staining and pitting |
| Vinegar or other acidic solution | Limited | Brief use only, then rinse and dry | Acid can dull polish if left on the surface |
| Steel wool or abrasive pad | No | Never use | Scratches the finish and traps metal particles |
The same manufacturer guidance supports a light-touch routine. Apply the approved product to a soft cloth or use a light spray, wipe with the grain rather than in circles, and keep liquid away from seams, control panels, and electrical openings. If residue remains, lift it with a clean damp cloth.
Routine stainless care follows the same logic. Ordinary cleaning can use water with soap, detergent, or a small amount of ammonia, followed by drying with overlapping strokes from top to bottom, and the surface should be rinsed whenever cleaning chemicals remain. Soap and water therefore sits in the table as a fully approved option in its own right.
Ten-second check: Is it ammonia-free? Does the label name stainless steel? Does it contain bleach, chlorine, or chloride?
If any answer is wrong, switch to mild soap and warm water. Test first in an inconspicuous area on fingerprint-resistant, coated, brushed, or decorative finishes. The underlying metal may be stainless steel, but the surface treatment on top of it can respond differently, and a hidden test costs you nothing.
Why the Label and Residue Decide the Answer
Think of stainless steel as wearing a thin, invisible passive film, a protective skin that rebuilds itself in air. That skin is why the metal resists rust under normal kitchen conditions. It's strong across the whole surface, but it's vulnerable in small, specific spots.
Here's the visual for how that damage starts.
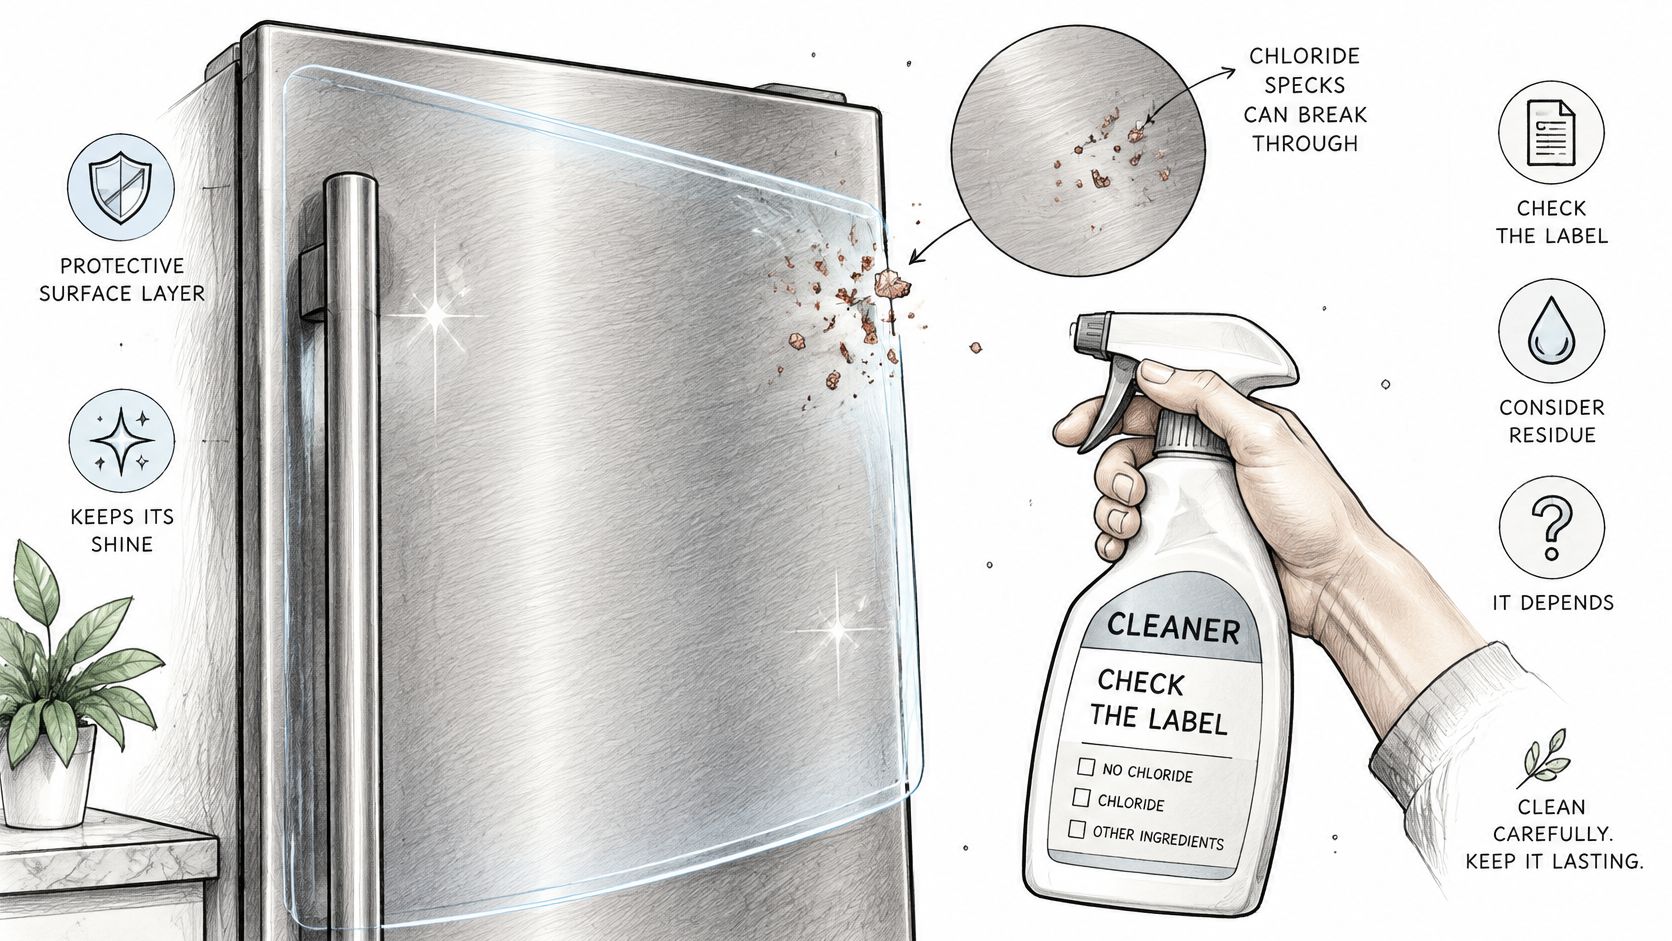
NASA's corrosion guidance on forms of corrosion explains the mechanism behind that skin. Stainless steel protects itself with a thin passive oxide film, and chloride ions can locally break down that film and initiate pitting corrosion. The result isn't even discoloration. It's small, deep, pinhole-like defects.
That's why a brief wipe rarely causes the harm people fear. Risk climbs with chloride concentration, heat, and retained moisture, especially where liquid sits in crevices with restricted fluid exchange. Say a fridge handle or sink rim stays wet for hours with salt, hard water, or bleach residue along the edge. That trapped, concentrated liquid does far more damage than a cleaner you wiped off in seconds.
The Pre-Wipe Check
Run these five questions before you spray anything.
- Ammonia-free: Does the label say ammonia-free?
- Named use: Does it name stainless steel?
- Chloride content: Does it contain bleach, hypochlorite, chlorine, or any other chloride source?
- Finish type: Is the finish coated, fingerprint-resistant, or colored? If so, test a hidden spot first.
- Liquid path: Will liquid run into seams, handles, or electrical openings?
If any of the first three answers is wrong, or the finish is unclear, don't use that bottle. Mild soap and warm water handles the job without the guesswork. If every answer passes, spray the cloth, not the appliance, so you control where the liquid goes.
Your appliance manufacturer's care guide overrides general advice, including this guide. If it restricts glass cleaners on your specific finish, follow it. A sensible routine is soap and water for weekly care, with an approved Windex formula reserved for quick, glass-style wipe-downs when fingerprints show. If you're comparing products for that quick job, our guide to choosing a glass cleaner spray covers what to look for on the label.
Check the label, keep liquid off seams, and rinse and dry every time.
That last step matters more than people expect. After cleaning, remove any remaining film with a clean damp microfiber cloth and dry completely, particularly near seams, sinks, and areas exposed to salt or hard-water deposits. Residue left to dry on its own is where streaks, spots, and eventually corrosion begin.
How to Clean Stainless Steel With Windex Step by Step
The method below keeps liquid where you want it and off the places that cause trouble. This overview shows the sequence at a glance.
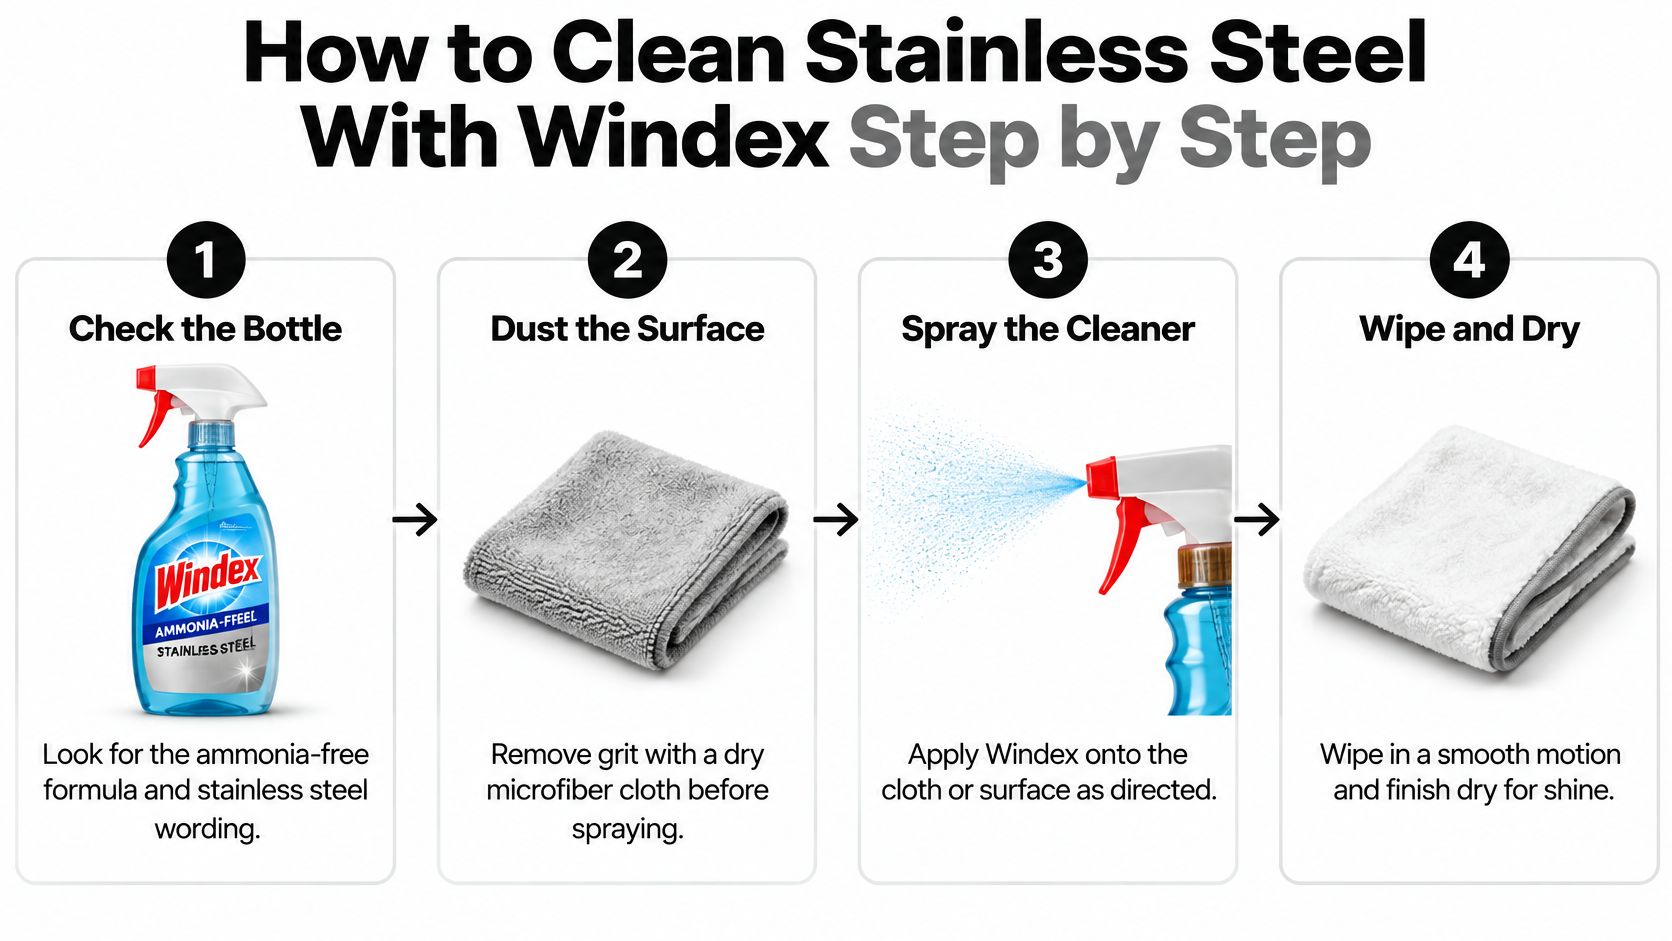
SC Johnson's Windex brand overview states that its ammonia-free Windex Glass Cleaner is suitable for stainless steel and describes Windex as producing a streak-free shine on it. The steps below follow that approved use.
- Check the bottle. Confirm it's the ammonia-free formula and that the label names stainless steel. This takes seconds and settles the whole question before you start.
- Dust first with a dry microfiber cloth. Loose grit dragged across a wet surface acts like fine sandpaper. Removing it dry prevents scratches you can't undo.
- Spray the cloth, not the appliance. Direct spraying lets liquid collect around seams, handles, and control panels where residue lingers. A dampened cloth gives you control over every drop.
- Wipe with the grain, using light pressure. Follow the polish lines instead of wiping in circles. Circular strokes cross the grain and leave visible arcs in the finish.
- Detail seams with the cloth's edge. A damp cotton swab also works for tight edges. Keep liquid out of electrical openings entirely, since moisture there is a safety issue, not just a cosmetic one.
- Remove residue with a second cloth. Dampen it with clean water and wipe the whole panel again. Leftover cleaner film is the main cause of the haze people blame on the product.
- Buff dry immediately. Use a clean, dry microfiber cloth before any moisture air-dries. Pooled or slow-drying liquid leaves water marks even on a perfectly cleaned surface.
- Test hidden areas on special finishes. Fingerprint-resistant, coated, colored, or unusually polished steel deserves a small test first. Compatibility depends on the coating and adjacent materials, not just the metal.
This short video shows the wiping direction and buffing finish in practice.
Avoid abrasive pads, steel wool, and aggressive scrubbing throughout. Mechanical abrasion creates visible scratches and disrupts the surface finish faster than any approved cleaner will.
When you're done, check the panel under side lighting from a window or under-cabinet light. A properly cleaned surface shows an even sheen with the grain running uninterrupted, no cloudy patches, and no rainbow-like film at the edges. If you see haze only at an angle, that's residue, so repeat step six rather than adding more cleaner.
Sinks, Fridges and Cookware Need Different Care
Not every stainless surface lives the same life, so match your method to the item in front of you. The metal is the same, but the main risk changes with water exposure, heat, and coatings.
Sinks
A sink sits in standing water, soap scum, and hard-water film all day. Rinse it after use and dry the basin and drain edge, because damp residue along that rim is exactly where spotting starts. If you're planning a kitchen update and comparing basins, reviewing sink options for home renovations helps you see which finishes and bowl shapes will need this daily dry-down habit.
Fridge Doors and Dishwasher Fronts
These panels are usually brushed or fingerprint-resistant, and that coating is the fragile part. Test a hidden spot near a bottom corner before using any Windex variant, then wipe only in the grain direction with a cloth you've sprayed. Handles deserve extra care because skin oils and cleaner both collect where the handle meets the door.
Cookware and Oven Interiors
Pots, pans, and oven cavities face heat and baked-on grease, which glass cleaner isn't designed to remove. Reach for hot soapy water and soaking time instead. Keep stainless cookware away from bleach-based oven cleaners, and don't scrape with metal tools, since deep scratches can trap particles and stain.
Two rules hold across all three categories. Keep liquid off seams and openings, and dry the surface completely to prevent water spots. The items differ in exposure, but pooled moisture causes the same problems on each one.
One warning before you move on. If a sink or fridge panel already shows tiny pinholes, treat that as a corrosion case, not a cosmetic flaw. Polishing won't restore metal that's already pitted, and continued use of the wrong cleaner will deepen it.
Safer Alternatives for Everyday and Stubborn Marks
Order matters here. Start with the gentlest option that fixes the mark you have, and only move up if it doesn't work.
Mild dish soap and warm water is the default for everyday cleaning. Add a few drops to a cup of warm water, apply with a soft cloth, wipe with the grain, then rinse with clean water and dry. It handles fingerprints, light grease, and daily smudges without any label detective work.
For a polished sheen on appliance fronts, a stainless-specific cleaner or polish labeled for steel is the better tool. Our own guidance on using a stainless steel cleaner and polish follows the same apply-lightly, wipe-with-the-grain, buff-dry routine. Put it on the cloth rather than spraying it toward controls.
Baked-on grease needs warm soapy water, soaking time, and a non-abrasive sponge. Windex isn't designed for baked grease, rust, or mineral scale, and scrubbing harder with the wrong product only adds scratches. For rust spots on outdoor or marine stainless, the approach used to treat surface rust on boat hardware shows how dedicated rust treatment differs from everyday wiping.
Hard-water spots respond to a brief wipe with diluted white vinegar. Keep contact short, rinse with clean water, and dry fully, and never use it on mixed-metal or sensitive trims. Skip baking soda paste on mirror-polished finishes, because even a mild abrasive paste can leave fine scratches in a high-gloss surface.
Your shopping list stays short.
- Soft microfiber cloths: Keep several so a clean, dry one is always ready for buffing.
- Mild dish soap: A few drops per cup of warm water is enough.
- Spray bottle of clean water: Use it for the residue-removal rinse.
- Stainless-specific cleaner: Choose one labeled for your finish type.
Fixing Streaks, Haze and Spots on Stainless Steel
Most marks left after cleaning are cosmetic and fixable in one wipe. A few signal real corrosion, and those need a different response. Start by matching your symptom to its likely cause.
| Symptom | Likely cause | Fix |
|---|---|---|
| Streaks or thin film | Residue left on the surface | Rinse with a clean damp cloth, then dry fully |
| Water spots | Air-dried water or pooled liquid | Buff dry with microfiber along the grain |
| Dull haze | Product buildup or hard-water film | Wipe with mild soap, rinse, then dry |
| Tiny pinholes or dark spots | Chloride or bleach exposure | Rinse at once; stop the product; seek advice if pitting persists |
| Visible scratches | Abrasive pad or wiping against the grain | Polish along the grain with a stainless-specific product |
| Rust-like speckles | Iron particles from tools or steel wool | Clean with mild detergent; use a stainless-specific cleaner for stubborn cases |
The British Stainless Steel Association care and maintenance guidance states that chloride-containing solutions, hydrochloric-acid cleaners, and hypochlorite bleaches can cause unacceptable staining and pitting, and it recommends thorough rinsing after cleaning. If a chloride or bleach cleaner spills on the surface, rinse it away right away with plenty of fresh water. Do not wait to see whether the spill matters. Flood it with water first.
Speed rule: Film and spots can wait until your next wipe-down. A chloride spill can't.
Streaks, film, and water spots are one-wipe fixes. Rinse with a clean damp cloth, buff dry along the grain, and they're gone. Dull haze from product buildup may need a few days of plain soap-and-water cleaning before the sheen evens out, especially if layers of cleaner have accumulated. A routine built around mild soap, a damp cloth, and full drying keeps that film from returning, and these daily stainless steel cleaning tips show how simple the everyday method can stay.
Tiny pinholes are the exception you can't buff away. They usually mean chloride or bleach has already broken through the surface, so rinse the area, stop using the product involved, and get professional advice if the pitting spreads. ASTM A380/A380M frames this correctly, treating cleaning as corrosion control where contaminants must be removed when they could impair the metal's normal corrosion resistance.
Here's how to tell the two apart. Cosmetic marks sit on the surface, change when you rinse and dry, and follow your wiping pattern. Corrosion signs sit in the surface, stay fixed in one spot after rinsing, and feel rough or recessed under a fingertip. When in doubt, rinse, dry, and recheck under side light.
If you want supplies made for household upkeep instead of borrowed from the glass shelf, Evo Dyne Products offers home cleaning essentials alongside how-to guides on cleaning methods and maintenance. Browse the range and the care guides, then make the rinse-and-dry finish part of every clean.